Quantcast
Channel: Main Dishes Archives - Kimchimari
Viewing all 77 articles
Browse latest View live

A Korean dinner party

$
0
0
Dinner with Korean banchan

Dinner with Korean banchan

Recently, I hosted a Korean dinner party for our American friends at home- some of whom have never tasted Korean food before. So it was a bit of a challenge to come up with a menu that could show the authentic taste of Korean food but at the same time would not be too much of a shock to their taste buds.  Since the party was on a Friday, I did not have my husband to help me during the day. So not only did I have to prepare the house (clean, decorate, set the table, etc), I also had to do most of the dinner preparations all by myself..  Hmm… so I knew I could  do some of the work in advance during the week, but I still wanted to make sure the menu was something I can handle. So-what is universally yummy but also not too time consuming to prepare?? That was the question..

squid stuffed with rice

squid stuffed with rice

But first a little bit about appetizers. Since I knew I was going to be busy cooking dinner (and let’s face it, appetizers are really not native Korean food), I asked my friends to bring some appetizers to share. In keeping with the Korean/Asian food theme, a friend made this amazingly yummy Rice Stuffed Squid. In Korean it’s called 오징어순대 (Oh-jing-uh Soondae) which means squid sausage. It was really touching that he took the time to search for the recipe and make it himself. It was really awesome.

Besides the squid dish, there were  egg rolls and really great home made lettuce wraps with pork stuffing that were also amazing. Thank you, Friends!

So here is my Korean dinner party menu that is quite authentic but easy and simple to prepare. Having had the party, I can now say with confidence that this is indeed a good menu for guests who are not very adventurous eaters (as some of my friends certainly are not). Some friends enjoyed it so much that they asked me where they could get the ingredients and how they could recreate this dinner on their own. That was definitely the best compliment anyone can receive.

Korean Party Menu for 12 people

  • Korean BBQ Beef Ribs (갈비구이 Kalbi Gui)-
    LA Kalbi without bones

    LA Kalbi without bones

    I bought and marinated approx 6 lbs of beef ribs cut “LA Style” (thinly sliced across the bone) using my Bulgogi marinade recipe. After marinating them overnight in the refrigerator, my husband grilled them outside on wood charcoals (100% wood charcoals is best) until each side was browned. Kalbi is quite tender but has lots of fat so grill the Kalbi after the guests arrive and keep the Kalbi warm until it is time to serve.

I love how this kind of cut rib produces really tender pieces but one thing I dislike is how sometimes the bone chips of the ribs end up on the meat making the texture feel gritty.  Even though I wash each piece individually in water first, it is almost impossible to avoid the bone chips. So for my non-Korean guests, I decided to take the meat off the bone.  This way, there is no bone to cut around and also eliminates any possibility of having bone chips in the marinade.

  • Zucchini Fritters (호박전 Hobahk Jeon) – sliced two good size Korean Zucchinies for the Hobahk Jeon. Make it in advance and keep it warm in the  warming drawer (moist) or cover it in tin foil and keep it warm in the oven at 200 F or so.
  • Fried Vegetable Dumplings (야채 군만두 Yache Mandoo) – pan fried one whole bag of frozen Pulmuone Vegetable Dumplings in some vegetable oil. Kept these warm in the oven with the hobahk jeon.
  • Germinated White Rice – optionally make brown rice or fried rice  instead of plain white rice.  But plain rice is easier to prepare than fried rice and is also better for your diet.
  • Salad with miso dressing- used a ready made miso dressing on some greens and some sweet corn (yes, I know..this is Japanese but it was just in case some guests didn’t like the Ssam). The Red Shell brand Japanese Miso Dressing is my all-time favorite Asian dressing (goes well with any Asian food) but I always feel it is a bit too thick and heavy. So I usually lighten it up by adding some fresh squeezed lemon juice – approx 1 T of lemon juice to 1/4 C of dressing. Try it, it really makes a huge difference.

    My favorite oriental dressing - Miso

    My favorite Asian dressing – Japanese Miso

  • Ssam (Lettuce Wraps) – served assorted lettuce greens, perilla leaves and ssukat from my garden. Everyone loved that they were home grown.
  • Ssam Jang (Spicy Soy Bean Sauce for Lettuce Wraps)- check my previous posting for Ssam Jang recipe. You can also buy Pulmuone brand Ssamjang in case you don’t want to make it yourself.
  • Kimchi – sliced and served whole cabbage Kimchi which is the most traditional type of Kimchi . My ultimate favorite brand of Kimchi is Jongkajip(종가집). It is actually imported directly from Korea. It’s expensive but I wanted to offer the best tasting Kimchi I could find. (For making Kimchi Jjigae, Kimchi fried rice or any recipe that requires larger amount of Kimchi, I usually buy a jar of Kimchi made locally because the local brands are cheaper and because after Kimchi is cooked most brands and types taste pretty good).

**If I had extra time, I would have loved to add a seafood dish to my Korean party menu- either Shrimp or Fish fillet Jeon, or grilled salmon of some kind.

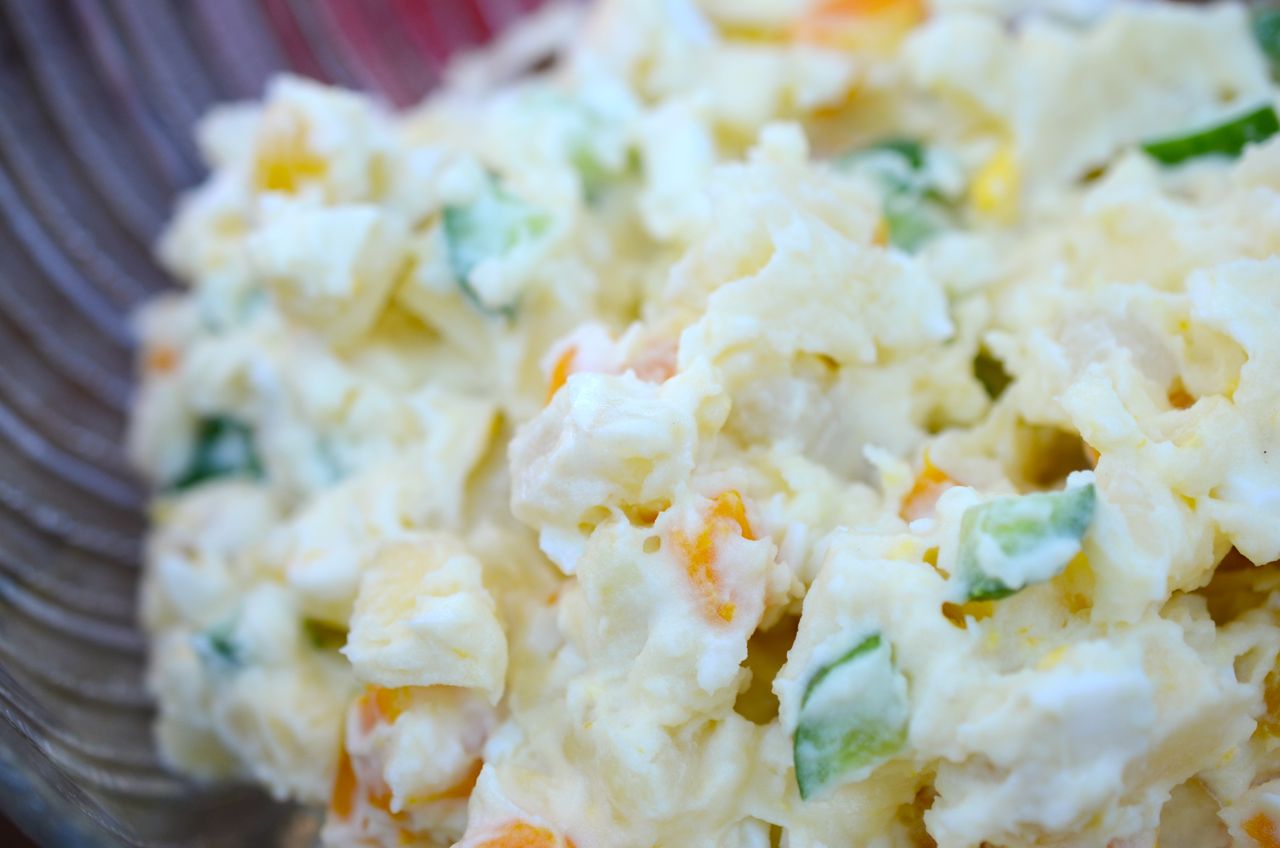
**Other dishes that go well with Kalbi are moo saeng che (radish salad), potato salad (both Korean style and American style work well) and jangahjii (korean pickles). Basically foods that are sweet and sour or creamy.

Serving the food

Table Plating- As you see in the picture below, I decided to plate the Ssam, Hobahk Jeon, Mandoo (dumplings) and sauces already on the table – Korean style. For a table of 12 people, I prepared 3 sets of banchan with their condiments,  so that each guest could reach them easily during the meal. Normally, I would have also placed Kimchi alongside each set here but because I thought some of my friends may find the smell a little offensive, I thought I would just pass the Kimchi around instead. For utensils, I gave everyone steak knives so they could easily cut the meat.

ssamjang, ssam, dumplings, hobahkjeon, soy sauce

ssamjang, ssam, dumplings & hobahkjeon(shared plate) and soy sauce (left to right)

Individual serving- For individual plates, I served the rice and Kalbi and let the guests actually serve the rest of the banchan (side dish) themselves from the table. The picture below is a sample of how a plate would look when all the food was served.

Dinner is served

Dinner is served!!

Doesn’t it look fabulous?! My friends really seemed to enjoy the food – especially the Kalbi of course. (About this picture – There was this one piece of Kalbi that escaped me and had the bones still in them.. I purposefully included it here so you could also see how it looks with the bone in.)

Centerpiece- Instead of buying flowers, I cut some lavender and lantana blooms from my garden. They looked beautiful but the arrangement was too tall.. next time I am going to try to make a proper centerpiece that is lower in height.

Lavender and Lantana from my garden

Lavender and Lantana from my garden

Well, I would say the dinner party was a total success!!

Oh! I forgot to mention the dessert.. I originally wanted to make some traditional Korean dessert like Yakwa ( I could have made this a day before) but didn’t get to… kind of disappointing.. But a friend brought cheese cake. So we had them with some berries!


Rice Cake Soup II – with beef and dumplings

$
0
0
Dduk guk with beef and dumplings

Dduk guk with beef and dumplings

I already posted my dduk guk recipe but this is a different take on it – I used beef stock instead and added dumplings. In some ways, this recipe is even simpler to make because the garnishes are easy. Dduk guk is something that all Koreans eat, but based on which province you live in, the recipes are different. Since my parents are originally from North Korea (moved down south during the Korean war), I grew up eating this northern Korean style with beef and dumplings (만두 mandoo) all the time. We always added rice to the dduk guk, mixed it altogether, and ate it with some wonderful homemade kimchi which was fermented in the ground all winter…simply heavenly.. Then I got married, and my husband, having been raised on the  southern Korean style of dduk guk, asked for a different kind with no dumplings and more elaborate garnishes like the one shown in my first dduk guk recipe post.

First, here is how to make beef stock with beef brisket. This beef stock recipe is a great foundation for many other Korean dishes such as Yukaejang and Wugeoji Guk- so pay close attention! You would think that making beef stock is probably all the same but I learned some great tips from my mother-in-law (and she makes the best beef soup I have ever tasted) which I am now passing on here.

Ingredients for beef stock:

  • 1 lb beef brisket
  • 1 medium onion
  • 2 green onions (for soup, optional)
  • 9 C cold water
  • 2 eggs slightly whipped
  • 1 sheet of dried sea laver cut into strips
  • seasoning for the beef garnish
    • 1/2 tsp gook kanjang
    • 1 tsp jin kanjang (regular soy sauce)
    • 4 T chopped green onion
    • 2 tsp chopped garlic
    • 1 – 2 tsp sesame oil
    • 1/2 tsp sugar
    • 1/8 tsp red chili pepper powder
    • 1/8 tsp black pepper

1. Peel the onion and use it whole. Wash and clean the green onions. Soak the beef in cold water for about 30 min to let it bleed out. If you don’t have time to soak the beef, you can skip this step. No big deal..I skip this step all the time.. :) but don’t tell that to my mother-in-law.. ;)

2. Add water, beef and onion to pot and bring it to boil over medium high heat (uncovered).Once it starts to boil, lower the heat, cover with a lid and let it simmer for 1 hour. The soup boils over easily so keep a close eye and reduce the heat quickly when it starts to boil over. Skim off any foam that forms on top to keep the soup clear.

beef brisket and onion in water

beef brisket and onion in water

beef brisket boiling in water

beef brisket boiling in water (foam removed)

This is a very basic Korean beef stock recipe that is used as a base for many Korean soups such as yukaejang or wugeoji guk. You can also eat this soup just by itself with some rice and kimchi and that’s a real simple comfort food to have in your repertoire.

3. Test the doneness of the beef by piercing it with a fork. If the fork goes in easily then it is done. If there is resistance, cook it a little longer.Take out the brisket, put it on a cutting board and let it cool. Cut it into 1 1/2 inch to 2 inch wide pieces against the grain – as shown on the left side of the picture below. Then tear them into smaller pieces by following the grain – shown on the right side of the picture below.

how to cut cooked beef brisket for Korean soup

how to cut cooked beef brisket for Korean soup

how to tear beef brisket for Korean soup

how to tear beef brisket for Korean soup

4. Season the torn beef pieces with the garnish seasoning (soy sauce, red chili pepper, garlic, green onion etc). Massage the beef well with your hand to make sure they are all well seasoned. This is a good time to use the handy dandy plastic glove.

seasoning beef brisket for garnish

seasoning beef brisket for garnish

5. Add 2 eggs to a small bowl, add pinch of salt and whisk it lightly. Set aside.

6. Discard the onions from the soup. Now you are ready to make the dduk guk. Refer to my previous dduk guk post for the next few steps in making dduk guk. Just substitute anchovy stock with beef stock made here. Also, you can add some frozen dumplings in addition to the dduk and you will have dduk mandoo guk (떡만두국). I didn’t have time to make my own dumplings so I used a store bought one (shown below).

pulmuone frozen kimchi dumpling

pulmuone frozen kimchi dumpling

When the dduk and dumplings are cooked they will all rise to the top. You can then add the egg mixture to the soup by pouring and circling it around the pot. This is so the egg is distributed evenly throughout soup. It should look like you made egg drop soup. So instead of the egg and beef garnish used in my first dduk guk recipe, top the soup with the beef garnish made earlier and also some dried sea laver strips.

dduk mandoo guk cooking in pot

dduk mandoo guk cooking in pot

dduk mandoo guk (떡만두국)

dduk mandoo guk (떡만두국)

Hope you enjoy my Dduk mandoo guk- northern style!

Tips:

Can I add more water in the middle of making the beef stock? Yes, if the stock has reduced too much (let’s say you forgot and left it simmering for too long or forgot to reduce the heat..), you can always add more water to increase the liquid amount. When adding additional water to any kind of meat stock, add boiling hot water. Never add cold water to soup that’s still cooking – this really diminishes the taste.


Can I use canned beef broth or chicken broth for dduk guk?
Yes, you can use canned chicken broth for the soup. I have not had much luck with beef broth though – it just doesn’t taste right.


Is it important to start making the beef stock from cold water or can I put the meat in boiling water?
Starting with beef in cold water makes a more richer tasting soup. If you put the meat in already boiling water, the meat flavor will stay more within the meat and not into the soup.


Shabu Shabu-Korean Style has just been posted..

Pan Seared Korean Dried Pollock (북어구이 Bugeo Gui)

$
0
0
Pan Seared Dried Pollock (Korean Bugeo Gui)

Pan Seared Dried Pollock (Korean Bugeo Gui)

Dried Pollock (북어bugeo) was actually NOT one of my favorite foods when I was a child. I am not sure exactly why but I think it had something to do with the fact that it often had many bones in it and I was never good at avoiding them. The bugeo that’s sold now have almost no bones and being married to a bugeo lover for 20 years, I have grown a true liking to them.

Bugeo (booguh/bukeo/buk-uh) is a great food to have in your pantry/freezer because you can make soups and side dishes out of it at any time. Since bugeo is dried, there’s no need to defrost. And a great thing about this dish is that you can freeze the marinated bugeo pieces in advance and just pan sear them almost instantly.

In Korea, dried pollock (bugeo) is traditionally known to have great health benefits. In general, it is said to have the ability to help the body get rid of toxins and also recover more quickly from a hangover. If you ask any older Koreans who like to drink alcohol, if the dried pollock soup (북어국 bugeo gook) helps them with their hangover, they will all swear by it. I have certainly made my share of bugeo gook in my younger days for my husband – good thing he is now mature and has not had a hangover in years..  My mother-in-law also believes in eating bugeo gook to help one’s body clear away any toxins before and after an herbal medicine regimen. I also remember my parents giving boiled dried pollock head soup to our dogs whenever they ingested something bad (even rat poison – after getting them to throw up the poison first) and most of the time they recovered fully. I searched online in both Korean and English and did not find much research on this but I did find that pollock has an abundant amount of an amino acid called methionine that helps with normal liver function  which is essential for elimination of toxins in the body. So make sure you keep some bugeo in your pantry!

Cooking time: 10 min per batch       Prep time: 15 min.          Servings: 4 – 6

This bugeo gui is also called 북어 불고기 bugeo bulgogi  because the marinade is pretty much the same. You just don’t need any tenderizers because the fish is already very tender. It is also called 북어 양념구이 bugeo yangnyum gui because the marinade is called 양념 yangnyum in Korean. However, many people may be talking about the more spicy version that uses gochujang. If you like things spicy, you can just reduce the amount of soy sauce (by 1/2 to 1/3) and substitute gochujang for the reduced amount.

Ingredients

  • 2 dried pollock (bugeo)
  • soy sauce marinade (maybe more than you need)
    • 6 T soy sauce
    • 4 T mirin or rice wine
    • 4 T sugar
    • 2 T honey
    • 1 T sesame oil
    • 2 T minced garlic
    • 1 t ground black pepper
    • 1 T toasted sesame seeds
    • 3 T chopped green onion
  • 2 – 3 cloves of thinly sliced garlic (optional)
  • 2-3 T sesame oil for frying

1. Reconstitute the dried pollock by soaking in cold water for 10 minutes or so until it becomes soft and spongy.

dried pollock (bugeo) soaking in water

dried pollock (bugeo) soaking in water

2. In the mean time, prepare the marinade by adding all the ingredients listed above. It is hard to measure the exact amount needed since the sizes of the fishes are all different. The amount I have here is a rough estimate and you should always use less to start and then add more after you taste it. As my mom always used to say – you can usually fix something that’s not salty enough but it’s much harder to fix something that’s already too salty. Too much salt is not good for you anyway…

marinade for bugeo gui

marinade for bugeo gui

3. When the dried pollock has become soft and fully hydrated, take it out of the water and squeeze lightly to get rid of any excess water. Cut the pollock into 2 inch wide pieces. Spoon the sauce over each piece. I would spread about 1.5 to 2 tsp of the marinade for each piece measuring approx. 2 x 2 in. You can stack them as you go. Note the color below and you may have some sauce leftover if your pollock is smaller than what I have here (mine measured about 11 inches long). The best way is to cook a piece and taste it first and then adjust the amount.

marinated dried pollock (bugeo)

marinated dried pollock (bugeo)

At this point, you can freeze some of the bugeo pieces for later. Whenever you need it, just take them out and pan fry them. The taste does not change at all. My MIL likes to make extra and keep them in the freezer for emergency banchan/side dish.

4. Heat a frying pan on medium high heat with 1 to 1 1/2 T of sesame oil.  Sesame oil has a low burning point so watch the pan carefully to prevent burning. You can also mix 1/2 sesame oil  and 1/2 canola oil to prevent burning.  When the pan is nice and hot, sear the bugeo pieces – 3-4 minutes on each side until they are nicely browned. Lower the temperature to medium to medium low if the pan starts to smoke too much. There is nothing to really cook, you can eat the dried pollock as it is so no need to worry about not cooking it thoroughly. Just try to get a nice sear on both sides to get those wonderful caramelized tastes of soy sauce and sweet sugar and honey.

pan searing soy sauce marinated dried pollock

pan searing soy sauce marinated dried pollock

5. Optionally, I fried some garlic slices in sesame oil in the same pan to add as a garnish on top of the fish. You can never go wrong with fried garlic!

That’s it! This is a pretty quick and easy dish to prepare. And it keeps well in room temperature for a day or so – which means it can be a delicious healthy lunchbox (doshirak)  side dish (banchan) for both adults and kids. You can also keep any leftovers in the refrigerator and eat it cold or reheat it in the pan.  Bugeo is low in fat, high in protein and high in essential amino acids so hopefully you can get some good quality bugeo in your neck of the woods. (I will be posting how to make bugeo gook next and will also discuss about how to buy good quality dried Pollock).

Pan Seared Dried Pollock (Korean Bugeo Gui)

Pan Seared Dried Pollock (Korean Bugeo Gui)

Couple things..

- Dried pollock (bugeo) can be stored at room temperature for weeks but if you want to keep it fresher longer, store it in your freezer.

- Quick note about all the different names Koreans have for the same fish but for the different state it is in.

  • 명태 (Myungtae) – is THE name for Alaska Pollock. They are caught in the North Pacific.
  • 동태 (Dongtae) – frozen Alaska Pollock
  • 생태 (Saengtae) – fresh Alaska Pollock
  • 북어 (Bugeo) – fully dried Alaska Pollock
  • 황태 (Hwangtae) – also dried Alaska Pollock but the process of drying involves freezing/drying in the cold winter months which produces a more intense flavor and dark yellow color
  • 코다리 (Kodari) – semi-dried Alaska Pollock

Dried Pollock Soup – Bugeo Gook (북어국)

$
0
0
Bugeo Gook

Bugeo Gook

My daughter called me the other day and asked me to post my Bugeo (dried pollock) Gook recipe because she wanted to make some for herself in her dorm. This is always one of the first things she asks me to make when she comes home from college. This soup is also one of the easiest and quickest Korean soups to make and is very popular because of its soothing and tummy warming taste. When I write these posts, sometimes I really wish there were more English words that can accurately describe the various ways Koreans express taste and texture. Koreans often describe the taste of this soup as 시원하다 (she-won-hada) which, when literally translated, means “cool” or “refreshing”. How can a soup that is piping hot be “cooling?” But when Koreans eat a soup that somehow feels like it reaches all the way down to your stomach, leaving you a clearing feeling, we say it tastes 시원하다. I looked up the word in the dictionary and it listed the following words – cool, refreshing, reviving, invigorating, clean, clear.  And I would say it is the combination of all these words and more that expresses the true taste of the soup.

The quality of the bugeo makes a huge difference in the taste of this soup. We get our bugeo usually from Korea so I can’t tell you about any specific brand I buy here but my advice is to buy the ones that are not too dry and not too hard (when they are too dry, they become hard like rocks and taste like paper) Buy those that are still a little soft and moist. If you can taste one before you buy, that is the best. It should taste good just by itself. If it tastes kind of like nothing, then it is too old and too dry and lost its taste. The color is not all that important because it is hard to say which ones are better with just the color. Because HwangTae (yellow dried pollock) is popular and is also more expensive, some sellers actually color their dried pollock with food coloring.

OK, let’s get cooking…

Cooking Time: 2o min.          Prep Time:   10 min.               Servings:  2-3

Ingredients

  • 2 handfuls of Bugeo (dried pollock) strips or 1 whole Bugeo
  • 5 C anchovy stock
  • 1 egg, beaten
  • 1 C sliced Korean radish (daikon radish is also OK) – optional
  • 1/4 onion, sliced
  • 2-3 green onions
  • 2 tsp sesame oil
  • 1 T chopped garlic
  • salt and pepper

1. You can either use a whole Bugeo and cut it into 1 1/2 inch pieces or tear them into strips like the picture on the right.

whole bugeo (dried pollock)

whole bugeo (dried pollock)

dried pollock (bugeo) strips

dried pollock (bugeo) strips

Strips are easier to eat when cooked so I like using strips. You can sometimes buy bugeo strips in packages so you may want to buy them instead of going through the trouble of tearing them into pieces.

2. Prepare anchovy stock. See my tipspage on how to make stock in advance.

anchovy stock

anchovy stock

3. Prepare the vegetables. Cut radish by first slicing a 1 inch thick round piece. Then cut it into halves and then into square pieces. Cut onions and green onions as shown below:

onion, radish and green onions for Bugeo Gook

onion, radish and green onions for Bugeo Gook

sliced onions, radish, green onions

sliced onions, radish, green onions

4. We are ready to start the soup! Turn the heat to medium high and add about 2 handfuls of bugeo strips (shown below):

bugeo (dried pollock) strips

bugeo (dried pollock) strips

5. When the soup starts to boil, lower the heat and add onions, radish and garlic. Stir and let it simmer for 15 minutes or so until the radish and onions are fully soft.

bugeo gook with radish and onions

bugeo gook with radish and onions

6. Add the green onions. After they have cooked for a couple minutes,  add the beaten egg to the soup. Season with about 1 tsp of salt, taste it and adjust to taste. Because the pollock is salty, you will not need a lot of salt. Sprinkle some black pepper.

7. Add the sesame oil and turn off the heat. Sesame oil loses a lot of the flavor and aroma when it’s cooked so remember to add it at the very end right before or after you turn off the heat.

bugeo gook with sesame oil

bugeo gook with sesame oil added

And there you go! Serve with some rice, kimchi and maybe some other side dishes and enjoy!

Some variations and tips -

  • add a dried red chili pepper or some red chili powder to spice things up
  • some people like to add tofu (1/2 C or so)  and/or soy bean sprouts (kongnamul 콩나물) to the soup to add extra flavor and texture
  • you can use water instead of stock if you don’t have anchovies
  • if you find that the soup doesn’t taste as good, chances are you haven’t put enough bugeo or garlic. Increase these amounts and most likely your soup will taste much better.

Spicy soy braised pork ribs (돼지갈비 조림 Dweji Kalbi Jorim)

$
0
0
Spicy braised pork ribs (돼지갈비 조림 Dweji Kalbi Jorim)

Spicy braised pork ribs (돼지갈비 조림 Dweji Kalbi Jorim)

This is Korean braised pork ribs cooked my family style – quite salty and spicy and not at all sweet.  Eating this dish always brings back my childhood memories – my absolute favorite but it also was a bit of a torture eating these because they were so spicy. It could be that I simply couldn’t handle the heat but I really think the Korean chili peppers were a lot spicier than the ones I get today in California. After eating about two ribs, my lips would start to hurt and then would start throbbing because it was so spicy and salty. Towards the end of the meal, my lips were basically numb. But I couldn’t stop eating…it was just too good…. my mouth is watering now just thinking about it! Unfortunately, I never learned how to make this dish before I left home. But kudos to my sis #2 for making this for me and giving me the recipe.

I don’t think I ever saw this dish served at a restaurant anywhere and I thought it was just one of those Korean foods that are made at home and not at restaurants. But when I searched on the Korean internet for Dweji Kalbi Jorim (braised pork ribs) recipes, I was surprised to find that there were no recipes similar to ours. Our ribs have no sweetness at all whereas all of the recipes I saw had some sugar and cooking wine which means there is added sweetness. They also usually have garlic which I don’t find necessary. In terms of ingredients, this recipe has very few – only 5 not including water. So this would be a great recipe for students or singles who really don’t (or even want to) have an extensive pantry of seasonings and ingredients.

Ingredients (5)

Servings: 4                  Time: prep 5-10 min + cooking 1 hr 15 min                  Difficulty: Easy

  1. 2 lb pork spare ribs
  2. 3/4 C + 2 T regular soy sauce (Kikkoman)
  3. 1 oz ginger (about 4 slices, each 1/4 in thick)
  4. 8 Korean green chili peppers (풋고추 putgochu) – use less if using spicier pepper
  5. 1/8 tsp ground black pepper
  6. 2 3/4 C water
  7. 1/8 ~ 1/4 tsp ginger powder (optional)

The pork ribs I used in this post was bought at Whole Foods Market (because they had a great sale!) but you can use your favorite ribs from your local store.

pork ribs on sale

Whole Food's pork spare ribs, St Louis style

These St Louis style (breast bone removed) spare ribs didn’t have too much fat and was not too big – perfect for our jorim.

sliced into individual ribs

sliced into individual ribs

1. Slice the ribs into individual pieces and soak them in cold water for 5-10 minutes to draw out the blood.

2. Prepare the ginger by peeling and cutting 4 to 5 of 1/4 inch thick slices.

3. Cut the  Korean green chili peppers into half or thirds (approx 1 1/2 inch long pieces).

cut Korean green chili peppers (풋고추 putgochu)

cut Korean green chili peppers (풋고추 putgochu)

I like to use Korean peppers because of their sweetness and milder taste. If these are not available to you, you can substitute Jalapeno peppers. Since Jalapeno peppers are considerably hotter than the Korean peppers, the amount should be reduced to 3-4 peppers depending on how spicy you want it.

3. In a pot, add the pork, water, soy sauce, ginger and black pepper. And optionally add the ginger powder.

ribs with soy sauce, ginger, water and pepper

ribs with soy sauce, ginger, water and pepper

  • Bring it to a boil on medium high heat.
  • Lower heat to medium, cook for 10 min.

4. Add about half of the chili peppers.

  • Lower heat to medium low and simmer for 25 min.
  • Taste a little of the sauce to make sure it’s not too spicy for you. If it’s ok, add the remaining chili peppers and simmer for another 20 min. The sauce should taste really salty – the meat will taste much less saltier so don’t worry.
pork ribs braised in soy sauce and green chili pepers

pork ribs braised in soy sauce and green chili peppers

This picture was taken when it was about half way done. Right after I added the rest of the peppers. And now you are ready to enjoy this wonderfully spicy, salty but the most mouth watering pork ribs you will ever have! Sprinkle some fresh green peppers on top to add some color.

Some tips

  • Because pork ribs have a lot of fat, you will see a lot of fat on top of the pot when it’s fully cooked. You can skim off the fat with a spoon if you are going to eat it right away. If you have some time, let it cool in a pot overnight or in the fridge and you will see the fat solids form on top. This is much easier to take out. But don’t take out all the fat – you need some for it to taste good.

    cooled pork ribs with fat solids on top

    cooled pork ribs with fat solids on top

  • This dish is quite salty so you definitely need some rice to help you out. Serve a sweet and tangy salad or a creamy potato salad with this dish (and of course, kimchi) and you will be in heaven!
  • The ribs will actually taste better when you reheat them the next day or the day after. Remember to add a bit more water every time you reheat.
Spicy braised pork ribs (돼지갈비 조림 Dweji Kalbi Jorim)

Spicy braised pork ribs (돼지갈비 조림 Dweji Kalbi Jorim) with green chili peppers


Hearty Beef Soup (고깃국 Gogiguk/Kokiguk)

$
0
0
Hearty Beef Soup (고기국 Gogiguk/Kokikuk)

Hearty Beef Soup (고깃국 Gogiguk/Kokikuk)

This Korean Gogiguk (고깃국) or Beef Soup/Broth is probably one of the simplest soups to make ever. It is also one of the most important to learn because it can be the foundatio for many other Korean soups such as Mandooguk (만두국), Yukgyejang(육계장), Mooguk (무우국)…etc.  But you may be surprised how wonderful it tastes- just by itself. I have previously mentioned making beef stock in my Dduk Guk w/ beef and dumplings post, but this deliciously clean yet hearty beef soup deserved a post all on its own. Also, the way how you finish the soup is different when you are serving it as a soup so here we go!

A little background on how this soup became my go-to soup to make when you don’t really feel like cooking a lot but do have some time to spare.

Korean food can be divided into Northern style and Southern style much like most cuisines based on the regions. After Korea was divided into North and South Korea in 1945, many North Koreans fled to Seoul and further south to escape the communist rule of North Korea. Because my parents are originally from North Korea (they fled to South during the Korean war too), the style of Korean food I grew up with was Northern. This style has been and still is my favorite, of course. North Korean foods are usually less spicy, less salty and more hearty than the Southern style, usually cooking with a lot of meat and their fat. Naturally, North Koreans needed more fat and less salt to survive their very cold winters. One can divide South Korean food  even further into different regions within South Korea but for now I’ll just group them altogether. South Korean food is spicier, saltier and usually lighter in taste. The saltiness and spiciness get stronger as you go down further south.

My husband’s family is originally from the South (my mother-in-law is from Seoul, so I got to taste the best of both worlds. This type of beef soup made from a leaner meat like brisket or shank must be more of a Southern style cause I just don’t remember eating this soup while growing up. Our family’s favorite soup was Kalbitang (갈비탕) which is essentially soup made from boiling short ribs – a lot richer soup even after skimming off the extra fat from the top. When I got married, my husband kept asking me to make this Gogiguk which I really did not know about and had to learn from my mother-in-law. This soup may not be as rich as Kalbitang but it is certainly flavorful enough and easy enough to make.

Once you learn how to make this Gogiguk, it’s quite simple but there are few tips that can make all the difference in the flavor. Here are some of them-

1. WATER: Using the right amount of water is important. Too much water and the soup will taste watery. Err on the side of using more meat and/or less water, you can always dilute it if it becomes too concentrated.

2. MEAT: Korean cuts of beef and US cuts are different so it’s hard to match up exactly but the best cuts for this soup are brisket, flank or shank. Find one that has some amount of marbling because if you use cuts that are too lean, they stay tough longer and is not as tasty when you eat it.

3. Do not add salt until the meat is fully cooked. Adding salt earlier will not allow all the flavors from the meat to be drawn out into the broth.

4. Do not add cold water to a hot soup/stock. If you need to add additional water to your soup during the cooking process, add hot water. Adding cold water will clear up the soup and will decrease the flavor.

Cooking Time: 1 hr 15 min                     Difficulty: Easy                                  Servings: 3-4

Ingredients

  • 1 lb beef brisket
  • 10 C water
  • 1 onion
  • 3 green onions (2 whole, 1 sliced)
  • Sea Salt
  • Fresh Cracked Pepper

1. Trim off any fat off the brisket. Soak it in cold water for 10-15 min. to draw out any blood in the meat.

2. Peel the onion and clean the green onion and cut off the root ends.

3. Bring a pot of cold water + meat+onions to a boil on medium high heat. Do not cover.

Pot with water, brisket, onion, green onions

Pot with water, brisket, onion, green onions

brisket boiling in water for Gogiguk

brisket boiling in water for Gogiguk

When it starts to boil, you will see some brownish foam appear on the surface. Skim off the foam as they are just impurities from the meat and will cloud up the soup.

4. Reduce the heat to low and let the soup simmer for 1 hour.

Fully cooked Gogiguk (Korean beef soup)

Fully cooked Gogiguk (Korean beef soup)

This is how the soup should look like when it is fully done. Season with some salt but allow each person to finish the seasoning on their own with additional salt and fresh cracked pepper.

Test the tenderness of the meat by piercing it with a fork or a sharp point of a knife. If it goes in easily without much resistance and also if there’s no blood coming out, the meat is ready to be taken out. Let the meat rest on the cutting board for couple minutes before slicing.

Fully cooked brisket

Fully cooked brisket

Cut the meat against the grain, cover and set it aside.

Cooked brisket slices for Korean Beef Soup(gogiguk)

Cooked brisket slices for Korean Beef Soup(gogiguk)

Serve some of the meat slices by itself with some soy sauce and vinegar. This is called Sogoki Sooyuk (소고기 수육) and is often served separately with the soup.

5. Lightly season the soup by adding some good quality sea salt. Start with 1-2 tsp, stir it well then taste and adjust. It is best to let each person finish the seasoning with some salt and pepper to their taste.

Serve the soup by adding few pieces of the sooyuk and some freshly cut green onions. I love just adding rice into the soup and eating it together with some kimchi or other side dishes. This rice and soup really enhances the taste of kimchi or any other Korean side dishes (especially more salty, spicy or sweet ones) because it serves as a great backdrop for them. Bon Appetit!


Know your beef cut!

$
0
0

I recently bought some brisket from an American grocery store. But when I brought it home and cooked it, it looked and tasted different from the Yangjimeori(양지머리 – also labeled “brisket”) that I usually buy from the Korean supermarket. And this is not the first time– it has happened to me many times before and always wondered why. I had a feeling that maybe the two cuts were not from the same part of the brisket. And so I started my quest for the truth..

I have researched for hours on end trying to figure out how Korean beef cuts and US beef cuts correspond to each other. OK, yes, they use quite different primal cuts (primal cuts are largest units of cuts that is further divided into individual retail cuts that are sold at stores) – and that’s fine. But what confused me terribly were the English cut terms used in Korean documents (I figured out eventually – after much frustration- that the terms used in Korea are mostly Australian and Canadian terms. Probably because US beef import was banned from 2003-2008 ). What was also frustrating was even within the US, the cut diagrams and names were not always the same.

Anyway, here is the diagram that I used for the US retail cuts:

retail beef chart

retail cuts 0f beef (www.askthemeatman.com)

Did you know that the US cuts are usually around 22, French and English cuts are 35 and the Koreans cuts are a staggering 120? It’s partly because Koreans use just about every part of the cow – from head to tail – including almost every organ meat along with the brain. Before it was imported into Korea, beef was always very expensive and this is probably why every part of the cow was utilized in Korean cooking.

Americans love steak, therefore, many primal cuts of beef are cut into cross sectional thick pieces to produce all different tender cuts of the steak. After that, bigger chunks used whole as roasts (for BBQ) or cut into cubes for stews or kabobs. Finally, any miscellaneous, not-so-tender meats are usually gathered together to make ground beef.

Koreans love soups and grilled meats. So any tough meat–including tendons and bones–are boiled in soups (탕 tahng) or cut into very thin slices against the grain (sometimes paper thin as in chadolbaeki/chadolbaegi(차돌백이) and grilled (usually unseasoned). More tender meats are sliced a little thicker and marinated to make bulgogi. The very tender meats are cut even thicker and grilled, unseasoned. Ribs are cut thin (as in LA Kalbi) or fanned out, marinated and grilled as Korean BBQ Kalbi or braised/boiled.

The table below lists the most widely used Korean cuts grouped under US primal cuts along with their corresponding US cuts. Chances are, you probably won’t need half of the cuts I listed here but I wanted to make the table somewhat complete – yeah, it’s an obsession I have…This list will definitely come in handy if you ever visit a legitimate Korean BBQ restaurant that serves a whole slew of different cuts of meat for grilling – each with a different texture and flavor.

In addition, I also discuss which beef cuts work best for of each method of Korean cooking.

Soups(국 Guk or 탕 Tang)

  • chuck meat (kkurisal 꾸리살, jaebichuri 재비추리) for stock, plain meat soup
  • ribs (kalbi 갈비) for Kalbitang(갈비탕)
  • brisket(yangjimeori 양지머리) for Yukejang(육계장), Jangjorim (장조림), Dduk Guk(떡국)
  • shank (sahtae 사태)
  • knuckle (doekanisal 도가니살) for Doekanitang (도가니탕)

Tip : start with cold water and meat, bring to boil and simmer until meat is very tender. Add onions, green onions for additional flavor.

Stew/Hotpot (찌게 Jjigae/전골 Jeongol)

  • neck meat(mokshim 목심)
  • brisket(yangjimeori 양지머리)
  • foreshank(apsahtae 앞사태)

Tip: Usually cut into small thin bite size pieces. Always cut against the grain.

Grilling (구이 Gui)

grill recommended:

  • tenderloin(ahnshim 안심)
  • rib eye(deungshim등심)
  • strip loin(chaekkeut 채끝)
  • outside skirt(ahnchangsal 안창살)
  • under blade steak/roast(salchisal 살치살)
  • brisket(chadobaekgi 차돌백이)

grill and marinated bulgogi recommended:

  • neck meat (mokshim 목심)
  • boneless top, bottom round(wudun 우둔, seolkisal 설기살)
  • chuck tender (kurisal 꾸리살)
  • blade steak (buchaesal 부채살)

Tip: The more tender meats are sliced and then grilled, unseasoned. The more tougher meats are best marinated and grilled as bulgogi.

Braised (Jjim 찜, Jorim 조림)

  • short ribs (kalbi 갈비)
  • shank (sahtae 사태)
  • boneless top, bottom round(wudun 우둔, seolkisal 설기살)

Tip: Meats are  first cooked slightly and then well seasoned, simmered in sauce until reduced, for a long time making the meat fully tender.

Boiled Meat (Suyuk 수육, Pyeonyuk 편육)

  • brisket (yangjimeori 양지머리)
  • shank (sahtae 사태)

Tip: To keep the flavor within the meat, cook in boiling water. Use any or all of green onion roots, peppercorns, garlic, onion and rice wine for smoother taste. Slice against grain – see my Gogiguk post. BTW,  suyuk is meat that is simply boiled and served in slices and Pyeonyuk is suyuk with fat and water squeezed out by further pressing with heavy weights to wring out any fat or water from the cooked meat.

Steak tartar (Yukhwe 육회)

  • shank (sahtae 사태)
  • flank steak (chimasal 치마살)
  • chuck tender (kkurisal 꾸리살)
  • boneless top, bottom round(wudun 우둔)

Jerkey (Yukpo 육포)

  • boneless top, bottom round(wudun 우둔)
  • eye of round (hongdukkaesal 홍두깨살)
PRIMAL CUT
 Korean
 US
Chuck Deungshim (등심) Chuck+rib eye roll
  Mokshim (목심) Neck meat
  Jaebichuri (제비추리) Neck chain
  Kkurisal (꾸리살) Chuck tender/mock tender
  Buchaesal (부채살) Blade roast/steak or Flat Iron Steak
  Salchisal (살치살) Under blade pot roast/chuck flap
  Kalbi (갈비) Short ribs: #1-#5
 
Rib Kkotdeunshim (꽃등심) Rib eye roast/steak
  Kkotkalbi (꽃갈비) Ribs: #6-#8
  Deung(cham)kalbi (등(참) 갈비) Back ribs: #9-#13
 
Short Loin  Chaekkeut (채끝) Top loin, strip loin
   Ahnshim (안심) Tenderloin
 
Sirloin  Boseopsal (보섭살) Top sirloin (rump/butt)
   Samgaksal (삼각살) Tri tip
 
Brisket  Yangjimeori (양지머리) Brisket (flat cut/flat half/first cut)
   Chadolbaegi (차돌박이) Brisket (point cut/point half/second cut)
 
Plate  Upjinsal (업진살) Short plate/skirt  steak
   Upjinahnsal (업진안살) Inside skirt
   Ahnchangsal (안창살) Outside skirt
 
Flank  Chimahsal (치마살) Flank steak
 
Shank  Sahtae (사태) Shank
   Apsahtae (앞사태) Foreshank
   Dwitsahtae (뒷사태) Hindshank
   Ahrongsaetae (아롱사태) Digital muscle
 
Round  Wudun (우둔) Boneless rump roast, top round
   Hongdukkaesal (홍두깨살) Eye of round
   Seolkisal (설기살) Bottom round
 Doekanisal(도가니살) Meat that surrounds the upper hind leg bone AKA knuckle

Whew..I almost gave up on this one…Writing this post was even more exhausting than my kimchi post. Hopefully, it’s helpful. Also, the list does not include any of the misc parts such as head, tongue, feet, tail, stomach and other organs because that’s a whole different post.

Well.. now you know!


Sweet and Spicy Pork BBQ (돼지 불고기 Dweji Bulgogi)

$
0
0
pork bulgogi

pork bulgogi

Spicy, savory, sweet, gingery and mouthwatering…That is the best way I can describe the taste of Pork Bulgogi. For some reason, we did not have this very often at home when I was growing up. The first time I tasted Dweji Bulgogi (돼지 불고기) was at my friend’s house when I was in 4th or 5th grade and I thought it was absolutely delicious. But it was also very very spicy! My friend’s mom cooked it right at the table on an electric grill for a group of us. It was really yummy but so spicy hot that I thought my lips and mouth were on fire! And yet, I simply could not stop eating it…The recipe here is the closest I could get to that taste except it is probably not as spicy – or maybe I am just better at eating spicy foods now. You are welcome to increase the amount of red chili powder or gochujang if you want to add more kick to it. I will leave that up to you.

You may notice that ginger is often used when Koreans cook pork. Ginger not only adds great flavor and gets rid of any “porky taste and smell” but is also known to neutralize the coldness of pork. In traditional Korean medicine, foods are divided into cold and warm foods. Pork is a cold food and ginger is a warm food. When used together ginger is said to help neutralize the coldness of the pork. I also know from experience that having a freshly brewed ginger tea really helps to calm my stomach down when I have a bad stomachache. I’m sure you have also heard about drinking ginger tea to help heal the common cold.  I have also read that Japanese serve ginger with sashimi to aid digestion and kill any bacteria that can be in the fish. There’s definitely something to ginger..

Print Recipe

Servings: 2-3                 Time: prep 15 min+ cooking 10 min + marinating time                Difficulty: Easy

Ingredients

  • 1 lb thinly sliced pork neck butt/leg/shoulder
  • 2 T soy sauce
  • 2 T Korean red pepper bean paste (고추장 gochujang)
  • 2 T cooking rice wine or mirin
  • 3 T sugar
  • 1 T sesame oil
  • 1 T sesame seeds
  • 1 T chopped garlic
  • 1 T grated or chopped fresh ginger
  • 1 T chopped green onions
  • 1/4 tsp garlic powder
  • 1~2 tsp Korean red chili powder (고추가루 gochukaroo)
  • 1/4 tsp black pepper

1. Traditionally, thinly sliced pieces from the neck, shoulder or hind leg (ham area) are used for pork bulgogi. The cut I bought from my local market is from the neck (collar butt) and it’s called moksal (목살) in Korean.

pork neck butt slices for bulgogi

pork neck butt slices for bulgogi

pork bulgogi meat

pork bulgogi meat


2. Make the marinade by mixing all of the ingredients above.

marinage for pork bulgogi

marinade for pork bulgogi

3. Mix the pork slices and the sauce together and marinate for at least 15 min. or more the better. You can let it marinate in the fridge for up to a day.

pork marinade for bulgogi

pork marinating in spicy bulgogi sauce

4. The best way to cook pork bulgogi is to BBQ it over a grill. But it’s not easy to just directly cook them over the conventional American BBQ grill because the pieces can fall through. Koreans usually use a grill that have smaller openings like the one below:

korean grill over charcoal

korean grill over charcoal

If using a standard American style grill, you can put a piece of tin foil and poke holes into it with a fork so some direct heat can come through. Like so..

tin foil with holes for Korean BBQ

tin foil with holes for Korean BBQ

You can also use grill baskets made for grilling vegetables or fish instead.

The other method is to buy a portable gas stove and a grill pan similar to shown here.

Portable gas stove and Korean grill pan

Portable gas stove and Korean grill pan

There are also other types of grill pans that have holes in them for the meat to get direct heat and these work great for bulgogi.

For everyday easy cooking, just heat a frying pan on medium high heat. The pan should be hot enough for the pork to sizzle as soon as it touches it. Cook the pork in the pan turning them over when it starts to brown. The pan should be really hot. Do not cook too much pork at once because that can lower the temperature. You want to cook the pork quickly and have a nice sear to them. If you end up with too much juice, the heat is probably not high enough or you added too much meat into the pan.

As a garnish, sprinkle some sesame seeds and sliced green onions. (optional)

Serve pork bulgogi with some rice, fresh vegetable side dishes or with some ssam and ssamjang and you can have a really deliciously hearty, quick and easy meal. It’s also a great dish to have with any jjigae or soup.

pork bulgogi and rice

pork bulgogi and rice

Tips

  • storage -  freeze either cooked or uncooked pork bulgogi. cooked bulgogi actually keeps the flavor longer.
  • variations – add sliced onions, carrots and/or mushrooms for added flavor

Soy maple glazed anchovies (멸치 볶음 Myulchi Bokkeum)

$
0
0
soy glazed anchovies with peppers

soy glazed anchovies with peppers

I am actually best known for my Myulchi Bokkeum among my friends and family. And it’s probably one of the dish I make the most. So I’m not sure why I haven’t posted this before…I guess I really didn’t think that it was anything special..but then recently eating at a restaurant, I realized how the taste can vary from the ones that are really bland,  to the ones that have the perfect balance of salty and sweet and then the ones that are just overloaded with spice and garlic – making it hard for you to really taste the anchovy at all.  Also in terms of texture,  it can be too wet and mushy or too hard and gummy – missing the perfectly chewy and crispy range in the middle. Of course, there is the wet version (Jorim)  which is supposed to be very soft but we are talking about the dry version here which is called bokkeum (볶음) and that is all about having the right amount of crispness without it being too hard.

Nutrition: Because you eat these anchovies whole including the bones, they are loaded in calcium. My husband says that this is how he was able to grow tall even though he hardly drank any milk while growing up. Myulchi is also a good source of DHA which is an important nutrient for the brain. So you can see that myulchi bokkeum is really one of the most nutritious lunchbox (doshirak) banchan you can make for your child. And most likely, your child will love the taste of it, so give this a try!

Print Recipe

Servings: 3-4                           Cooking Time: 15 min                               Difficulty: Easy

Ingredients

  • 1 C small dried anchovies for stir fry (볶음 bokkeum)
  • 1 T vegetable oil
  • 1 pc of ginger slice (1/4 in thick)
  • 2 shishito/green chili peppers (optional)
  • for the glaze
    • 1 T soy sauce
    • 1 T sugar
    • 1 T sake or rice wine
    • 1 tsp water
    • sesame seeds
    • 1/8 tsp garlic powder
    • 1 tsp maple syrup or rice syrup or malt syrup
    • 1/4 tsp sesame oil

1. Try to buy good quality dried anchovies (마른 멸치 mareun myulchi). They should not be too dry (it should still be somewhat soft and not hard). If the anchovies are really dry it means it’s too old. The best way to judge the quality is to taste them – they should be still soft, chewy and taste not too salty but meaty and even a bit sweet. Here’s a pic of some good quality myulchi and their varying sizes. All these three sizes are good for making myulchi bokkeum.

different sizes of dried anchovies

different sizes of dried anchovies

Anything bigger, it is really not fit to be eaten whole since the innards taste quite bitter. Some people may even say that the bigger size at top left is too big. But if you take off the head along with the gut from the anchovy, you can enjoy a more meaty mulychi bokkeum. Below is a photo that shows how you can take out the gut and the head – hold the head with one hand and twist it off gently and most likely the gut will come off with the head.

gutted anchovies

gutted anchovy (top right)

2. Prepare the glaze -  in a bowl, add soy sauce, sugar, sake, water, and sesame seeds. Set aside. Cut shishito peppers into bite size pieces.

ingredients for myulchi bokkeum

ingredients for myulchi bokkeum

3. On medium high heat and brown ginger in oil (2 min or so) until brown. The essence of ginger will get infused into the oil which will take away any fishy smell from the anchovies.

ginger in oil

ginger in oil

myulchi saute

myulchi saute


4. Add dried anchovies and sliced peppers to the hot ginger oil and saute for 3-4 minutes until they are slightly browned. This step is very important. Make sure you saute enough until the anchovies are well browned before going to the next step.

5. Lower the heat and add the soy sauce glaze to the pan. Stir for about 2 min. until the anchovies are evenly glazed with the sauce.  Drizzle the maple syrup and stir for another 1 – 2 min until the anchovies are well coated and has a sheen to them. Turn off the heat. Finish the dish by drizzling some sesame oil.

myulchi bokkeum

myulchi bokkeum

Serving Suggestions

Myulchi Bokkeum is really one of the most basic banchan in a classic Korean meal. It is a great item in children’s lunchboxes and also in ssam (try this instead of pike mackerel or bulgogi in a ssam). Also great with various soups – both spicy and savory/mild flavors.

Storage

Most markets will store these in the fridge but it tastes best when it is kept at room temperature. It will stay fresh for days to even a week at room temperature due to its salt and sugar content.

Variations

Make a spicier version by reducing soy sauce to 1/2 T and adding 1/2 ~ 1 T gochujang. The recent trend is to add nuts such as walnuts, sliced almonds and peanuts when making myulchi bokkeum so it’s something worth trying if you like nuts.


Know your Pork Cut!!

$
0
0

Pork is probably the most popular meat in Korea. Partly because it’s much more affordable than beef but also because the fatty flavor of pork really goes well with many Korean seasonings and condiments, especially Kimchi. Adding pork to Kimchi Jjigae really transforms it into a very hearty, flavorful stew.

When compared to beef, Pork cuts are simpler – 22 pork cuts vs 100+ beef cuts! And as far as the primal cuts go, there is almost a one-to-one correlation between Korean cuts and US cuts. But again, Korean pork cuts are further divided into more detailed smaller cuts.

First, here’s the US pork cut diagram from http://www.clovergarden.com:

North American Pork Cut Diagram

North American Pork Cuts

And below is a diagram that shows all the different Korean Pork cuts within each US primal pork cut. Believe it or not, I drew this by hand!!! I just could not find one that properly showed all the different cuts in the right location so after searching the internet for many hours, I decided I would spend even more hours to draw the Korean pork diagram myself…why I do these things, I don’t know.. :)

Korean pork cuts diagram by JinJoo Lee (www.kimchimari.com)

Korean pork cuts diagram by JinJoo Lee (www.kimchimari.com)

Now, let’s go over each of the 22 Korean cuts of pork along with applicable US cuts.

Primal Cut Korean US
Tenderloin (Ahnshim 안심) 1. Ahnshim sal(안심살) Tenderloin
Loin (Deungshim 등심) 2. Deungshim sal(등심살) Boneless loin
3. Al deungshim sal (알등심살) Boneless loin (center loin, closer to spine)
4. Deungshim dut sal or Gabrit saal(등심덧살, 가브릿살) Blade end loin (front top loin)
Butt/Boston Butt (Mokshim목심) 5. Mokshim sal (목심살) Butt
Picnic, Shoulder (Apdari 앞다리) 6. Apdari sal (앞다리살) Boneless picnic (shoulder)
7. Apsahtae saal (앞사태살) Boneless picnic (more leg than shoulder)
8. Hangjeong sal (항정살) Neck (part picnic, part butt)
Leg, ham (Dwitdari뒷다리) 9. Bolggi sal (볼기살) Butt end of ham
10. Sulkit sal (설깃살) Center part of ham (middle)
11.Dogani sal(도가니살) Center part of ham (near loin, belly)
12. Hongdukkae sal(홍두깨살) Center part of ham (near tail end)
13. Boseop sal (보섭살) Rump
14. Dwitsahtae sal(뒷사태살) Shank end of ham
Belly (Samgyeop sal 삼겹살) 15. Samgyeop sal(삼겹살) Belly meat from rib #5,6 to end of side, ending before hind leg
16. Galmaeggi sal(갈매기살) Flap meat
17. Deung kalbi sal(등갈비살) Baby back ribs (from rib #5 to end)
18. Tosi sal(토시살) End part of flap meat, near butt end
19.  Ohdolsamgyeop sal(오돌삼겹살) Rib tips (from rib #5 to end)
Ribs (Kalbi 갈비) 20. Kalbi (갈비) Front ribs (#1-#5)
21. Kalbi sal (갈비살) Boneless rib meat (#1-#5)
22. Maguri (마구리) Rib tips (#1-#5)
Jowl (Bolsal 볼살) 23. Bolsal (볼살) Cheek/Jowl

Note that the cuts are not always an exact match.

  • 24. Jok bal(족발) usually includes bottom part of the hock but not all. The upper part of the hock is also included in Sahtae(사태).

Here are some additional tid bits that’s worth mentioning:

  • 16. Galmaeggi sal(갈매기살) – This is Flap meat taken from the concave part of the spareribs and Saint Louis ribs. In the US, it is usually trimmed off from the ribs and is either ground up for sausage meat or chefs just eat it as snack(aka Chef’s bonus). Koreans consider this cut a delicacy and restaurants advertise this cut as their featured menu. Because this is a muscle near the diaphragm, it can get exposed to the pig’s innards and can be contaminated. Careful cleaning and preparation is important when eating this cut.
  • 18. Tosi sal(토시살) – This cut is separated from Galmaeggi sal and is so small (only about 3 oz per pig) that it’s often sold as part of Galmaeggi sal. Some people love the taste of Tosi sal because of it has more intense flavor and chewy texture than Galmaeggi sal.

Finally, here is a list of which cuts work best for each cooking method:

Soups(국 Guk or 탕 Tang)

  • shoulder, picnic(apdari sal, apsahtae sal)
  • center cut of ham(seolkit sal, dogani sal)
  • rib tips(maguri)

Stew/Hotpot (찌게 Jjigae/전골 Jeongol)

  • center cut of ham(dogani sal)
  • butt(mokshim sal)

Grilling (구이 Gui)

Koreans are masters at grilling all kinds of tough, chewy meat by slicing them thinly against the grain.

  • basically all cuts except the Loin area are popular for grilling. Most popular are slices from the Belly(samgyeop sal) and Tenderloin(ahnshim sal).

marinated bulgogi recommended:

  • loin(deungshim sal)
  • butt(mokshim sal)
  • butt end of ham(bolggi sal)
  • rump(boseop sal)
  • leg of ham(dwitsahtae sal)

Braised (Jjim 찜, Jorim 조림)

  • tenderloin(ahnshim sal)
  • picnic(apdari sal)
  • rump, leg, butt end of ham(boseop sal, dwitsahtae sal, bolggi sal)
  • baby back ribs(deungkalbi sal)

Boiled Meat (Suyuk 수육, Pyeonyuk 편육)

  • butt(mokshim sal)
  • leg of ham(dwitsahtae sal)
  • belly(samgyeop sal)
  • rib tips(ohdolsamgyeop sal)

Sweet and Sour pork (Tangsuyuk 탕수육)

  • tenderloin(ahnshim sal)
  • loin(deungshim)
  • center cut of ham(seolkit sal, dogani sal)

** Special appreciation to Mr.Grygus at www.clovegarden.com for granting me permission to use his chart and cut information. His site has some great information about the various cuts.

** AmazingRibs.com also was a great resource for understanding how exactly the ribs and belly parts were cut.

Hope this was helpful!!! Hope you will get to enjoy some great samgyeop sal BBQ very soon!


Chuncheon Chicken (춘천 닭갈비 Chuncheon Dak Kalbi)

$
0
0
Chuncheon Dak Kalbi (춘천 닭갈비)

Chuncheon Dak Kalbi (춘천 닭갈비)

Last winter, an old college friend of mine invited me and a few friends to visit her in Chuncheon. In return she offered to buy us the famous Chuncheon Dakalbi (춘천 닭갈비). Chuncheon is a city east of Seoul that is near the upper Han river and is known for it’s natural beauty – especially near the Chuncheon Dam. The city is only about an hour away from where I live so it was an easy trip to make.

Chuncheon Dak Kalbi was born in the late 60′s and became quite popular because of it’s taste and price. Just how popular? Guess how many restaurants there are in Chuncheon? 618!!! And population is only about 270K!?! With the abundance of chicken farms in Chuncheon, restaurants could buy the chicken at very reasonable prices which was a big plus in the 60′s or anytime I guess. Dak Kalbi which literally means Chicken Ribs and white meat were especially cheap at that time since white meat was not a popular cut at that time – no one worried about diets back then.

The restaurant we went to was quite full even though it was a very cold winter day and it snowed just a couple days before. But a perfect room was ready for us – a traditional Korean style ondol(온돌) room where you sit on this toasty warm floor.. Once your butt meets the ondol floor..well, you just melt onto the floor.

We ordered the Chuncheon Dak Kalbi for 4 and they brought in this large saute pan filled with chicken marinated in their special gochujang sauce. We were then instructed to cook the chicken first for a bit and then add the vegetables. Here’s a picture of their Dak Kalbi.

Chuncheon Dak Kalbi(춘천 닭갈비) at restaurant

Chuncheon Dak Kalbi(춘천 닭갈비) at restaurant

We cooked it until everything is soft and tender and then ate it with some ssam! Yumm.. Koreans just love to eat ssam with everything I guess.  And then when you think you just can’t eat any more, they add rice to the leftover sauce and make fried rice with it!!

Chuncheon Chicken Fried Rice

Chuncheon Chicken Fried Rice

Much like my Soft Tofu Stew recipe, you can make the sauce first and use the leftover later.

Ingredients for Dak Kalbi Sauce

  • 4 T gochujang
  • 3 T Korean red chili powder (고추가루 gochukaroo)
  • 1 T Korean curry powder or 1 tsp curry powder
  • 1 tsp Garam masala (optional) – you can just increase curry powder instead
  • 1/8 tsp ground black pepper
  • 2 T Apple lemon soy sauce
  • 4 tsp dark soy sauce (진간장 jinkanjang)
  • 2 T red wine or 1 T mirin
  • 2~3 tsp sugar
  • 2 T Green plum syrup (매실액 maesil syrup) OR 2 T rice malt syrup + 2 tsp vinegar
  • 1 T sesame oil
  • 2 T Garlic pear seasoning paste
Gochujang sauce for chuncheon chicken

Gochujang sauce for chuncheon chicken

Make the sauce for Chuncheon Dak Kalbi by mixing all of the above.

*In case you don’t have some of my special ingredients:

Instead of 2 T Apple Lemon soy sauce + 4 tsp dark soy sauce, substitute

  • 3 T dark soy sauce
  • 3 T sweet rice wine (mirin)
  • 2 tsp sugar

Instead of 2 T Garlic Pear Seasoning paste, substitute

  • 1 T chopped garlic
  • ½ tsp chopped ginger

Servings: 4         Cooking Time: Prep 15 + Cook 25 min      Difficulty: Moderate

Ingredients for Chuncheon Dak Kalbi

  • Approx 1/2 of the sauce or more to taste
  • 1 ½ lb chicken (thigh + breast)
  • 6 oz sweet potato (heaping 1 C when cut – see pic)
  • 6 oz cabbage (4 C when cut)
  • 1 onion
  • 3~4 oz rice cake (ovals or ttoekbokki)
  • 3 green onions or 1 Korean large green onions (대파 Daepa)
  • 6~10 perilla leaves (깻잎 Kkaetnip)
  1. Remove fat and skin(optional) from chicken into bite size pieces.

    Chicken thigh meat cut into bite size pieces for Chuncheon Chicken

    Chicken thigh meat cut into bite size pieces for Chuncheon Chicken

  2. Marinate chicken with the sauce. Use about 1/2 of the sauce to coat all the chicken. Leave chicken for 1 hour or overnight.

    Dark and white meat chicken marinating in chuncheon dak kalbi sauce

    Dark and white meat chicken marinating in chuncheon dak kalbi sauce

  3. Peel onions and sweet potato. Cut onions, cabbage into roughly 1 inch squares. Cut sweet potatoes into 1 inch squares 1/3 inch thick. Slice green onions.

    Vegetables for Chuncheon Dak Kalbi

    Vegetables for Chuncheon Dak Kalbi

  4. Cut perilla leaves into 1/2 in strips.

    How to cut Perilla (Kkaetnip) leaves

    How to cut Perilla (Kkaetnip) leaves

  5. Heat pan and add chicken, rice cakes and sweet potato.I used my favorite Staub sauté pan here but you can use whatever pan available. Make sure it’s not too shallow. Add 3 T water and sauté on medium heat for about 5 minutes.

    Chicken in pan with sweet potato and rice cakes

    Chicken in pan with sweet potato and rice cakes

  6. Add remaining vegetables (cabbage, green onions, onions) and sauté on medium heat for 10~12 min until chicken is fully cooked. Taste and add more sauce if necessary. *I added about 2 T additional sauce to taste.

    Chuncheon chicken with vegetables added

    Chuncheon chicken with vegetables added

  7. This is when it’s fully cooked.

    Finished Chuncheon Chicken

    Finished Chuncheon Chicken

  8. Finish the dish by adding cut perilla and optionally some toasted sesame seeds.

Serve with rice.You can also eat it with some ssam and it will taste even better.

For an extra treat, finish the meal by making fried rice with drippings from the pan and any leftover chicken from the table. Add some remaining ssam lettuce if you’d like as you see in the picture above.

The unique taste of this dish comes from the slight hint of curry flavor hidden behind Korean gochujang sauce. Korean curry powder contains only about 10% actual curry spices so the flavor is much milder compared to the original curry powder mix so be careful not to add too much when you are using real curry spices otherwise you may end up with Chicken curry instead!

Bon Apetit!


Korean Rib Eye Steak Salad with Soy Plum Dressing

$
0
0
Hydrangeas in fall Korea

Fall Hydrangeas, Korea 2013

Cool and crisp fall days mean it’s perfect weather for Korean BBQ and ssam. Luckily, I had a beautiful piece of Korean rib eye steak in the fridge! My first thought was just to grill it and make ssam with it.

But today was just lunch for 1 and I was too lazy and hungry to make rice. I wanted something different but easy to make…hmm..then, why not a steak ssam salad?

Steak Ssam Kimchimari style

Steak Ssam Salad – Kimchimari style

Before I talk about the salad, a little note on the Korean style rib eye or deungshim (등심) steak cuts: they are a lot thinner (only about 1/2 in or 1.25 cm thick) than American rib eye steaks which makes them ideal for BBQ and ssam. The Korean deungshim steak cut is also bigger than the US rib eye and typically includes the back strap (yellow ligament 황색 인대, see lower left part of the picture).

Korean deungshim (등심) or rib eye steak cut

Korean deungshim (등심) or rib eye steak cut

The back strap is always removed in the US cuts probably because Americans find it  too chewy and tough. However, many Koreans actually consider it as a delicacy. I also generally prefer chewy texture, but I actually found the back strap too chewy, even for me.. ;)

So what kind of dressing should I make for the salad? Then I thought of a relatively new side dish for grilled meats that is now served in just about every BBQ restaurant in Korea. The side dish is sliced fresh onions served in soy-vinegar sauce that’s meant to be eaten with grilled meats. I am not sure when exactly it came into existence but the onion salad definitely did not exist 20 years ago. Sadly, the dish has no clear name. If you have eaten at a Korean BBQ (Gui Jip 구이집) restaurant recently, the chances that you had something similar to this onion salad (양파 무침 yangpa moochim) is very high.

Korean onions in soy vinegar sauce

Korean onions in soy vinegar sauce

This example of the onion salad is from a Korean blog.

I love the tangy and fresh taste of this onion salad (양파무침 Yangpa Moochim) so I created the following dressing with an added twist of lime.

Soy Maesil Dressing Ingredients

  • 2 T rice vinegar
  • 2 T maesil(plum) syrup
  • 1 tsp dark soy sauce
  • 1 tsp lime juice (optional but tastes so much better if you add it)

Make the dressing by mixing all the ingredients together. You can substitute 2 T maesil syrup for 4 tsp rice wine + 3 tsp sugar + 1 tsp water.

Steak Salad

Servings: 2           Cooking Time: 10 min            Difficulty: Easy

Ingredients

  • 1 lb (450g) Korean rib eye steak (deungshim steak 등심 스테이크)
  • handful of chrysanthemum(ssukat 쑥갓) leaves
  • 1 small head of green and/or red leaf lettuce
  • 1/2 large purple onion
  • 2-3 cloves of garlic
  • 2 T olive oil
  • sesame oil
  • sea salt
  1. Wash ssukat and lettuce leaves. Tear into small bite size pieces and set aside.

    Red and green lettuce, purple onions, ssukat for Korean Steak Salad

    Red and green lettuce, purple onions, ssukat for Korean Steak Salad

  2. Slice onions and garlic thinly.
  3. Trim off any excess fat from the rib eye steak as much as possible.
  4. Heat pan on medium high heat and add 1~2 T olive oil. When oil is hot (swirls around like water), add garlic slices and brown them. Set aside. Drain garlic oil from pan and use it in other dishes.

    Fried garlic in olive oil

    Fried garlic in olive oil

  5. Wipe any remaining oil from pan and heat up the pan again for 1 min on high heat. Cook the steak in the pan for 1-2 min on each side or until it’s browned nicely on both sides. Do not overcook.

    Korean steak salad with plum soy dressing

    Korean steak salad with plum soy dressing

  6. Cut steak into bite size pieces and serve with onions, lettuce, ssukat, roasted garlic and salad dressing.

Alternate Serving Suggestions

JJ's style Korean rib eye steak salad

JJ’s style Korean rib eye steak salad with ssam elements

This is somewhat of a reconstructed ssam (minus the ssamjang) with a style similar to a lettuce wrap. But it comes already assembled so all you need to do is just to wrap and eat it.

  • Assemble and stack (starting at the bottom) : couple pieces of small leaf lettuce -> purple onions -> piece of steak -> a drizzle of sesame oil -> few specs of good quality sea salt -> roasted garlic -> top it with ssukat -> sprinkle soy plum dressing.

And there you go! You have just made a fabulous Korean style steak ssam salad a la JJ (or Kimchimari) style. See picture at top of page for the final presentation.

For extra kick of flavor, add some yellow mustard paste (1 tsp or less) to the dressing.


Sweet and Savory Beef Rib Stew (갈비찜 Galbijjim/Kalbijjim)

$
0
0
Kalbijjim_finished

Kalbijjim_finished

This is Korean food at its best. Kalbijjim/Galbijjim(갈비찜) was certainly one of my favorites as a kid and is still very much at the top of my list to this day. As a kid, I loved to eat just Kalbijjim, rice and Kimchi. It was a perfect balance of flavors for me. The combination of sweet yet savory, juicy yet melt in your mouth tender beef ribs with a great depth of flavor and the crunchy, spicy cabbage Kimchi to break up that little hint of fat was simply just too delicious for my figure. haha.. Even when all the ribs were gone, I savored every last drop of the remaining Kalbijjim sauce by mixing rice and the sauce together.

Koreans traditionally make this dish for great holiday occasions such as New Year’s and also for their most honored guests. So if you have visited many different relatives homes during the New Year’s, you do kind of get sick of it towards the end. Sadly, very few Korean restaurants (both abroad and in Korea) serve this dish anymore so you may not have been able to taste this at all.  If you like Korean BBQs like bulgogi or kalbi, then you must try making this dish.

Kalbijjim is also a great party dish because you can make ahead of time. You just reheat when guests arrive. Kalbijjim, rice, kimchi, lettuce salad and any kind of jeon makes a fabulous party menu anytime.

Among the various beef cuts, Korean beef ribs are perhaps the most expensive cut and is certainly not something average Koreans eat or make often. When I went shopping to buy beef ribs (갈비 Kalbi) from our neighborhood market, I was told that it’s not a beef cut they normally carry because it’s so expensive. The butcher told me to come back during New Year’s or Chuseok holiday.

Servings 6       Time: Prep 15 min + Cook 2 hrs       Difficulty: Moderate

** Cool Kalbijjim overnight for best results.

Ingredients

  • 4 lbs (1.8kg) beef short ribs (갈비)
  • 5~6 large dried or fresh shitake mushrooms
  • 10 oz (300 g) Korean radish (daikon also works) – about 1 1/2 C cut up
  • 2 carrots
  • 12 chestnuts, peeled (canned chestnuts is ok)

Ingredients for Kalbijjim sauce

  • 3/4 C + 3 T (add later after tasting) dark soy sauce
  • 1/2 C sugar
  • 1/2 C mirin or sake
  • 2 T honey (+ 1 tsp as a finish)
  • 2 T sesame oil + 2 T (add right before finish)
  • 1/2 tsp sesame seeds
  • 1/8 tsp black pepper
  • 2 ~ 3 T chopped garlic
  • 2 T chopped green onion + 1/2 stalk for broth
  1. Soak dried shitake mushrooms in warm water. Fully immerse mushrooms in water by adding weight on top. This will help reconstitute mushrooms quicker.

    soaking shitake

    soaking shitake

  2. Peel and cut radish and carrots into roughly into 1.5 inch pieces.

    carrots_radish

    carrots and radish for Kalbijjim

  3. Rinse ribs in cold water to get rid of any bone fragments. (I bought these short ribs from emart. They are imported from Canada.)

    canadian beef short ribs for Kalbijjim

    canadian beef short ribs for Kalbijjim

  4. Trim any excess fat and score center of the ribs so that the meat will cook faster and also absorb the sauce more readily.

    cleaned and cut short ribs

    cleaned and cut short ribs

  5. Add cleaned and trimmed ribs to a large enough pot and fill with cold water. Bring water with ribs to a quick boil and flash cook the ribs for 3~5 min. This is to get rid of any gamey taste that beef ribs can sometimes have. This step is optional.

    ribs cooking in water

    ribs cooking in water

  6. Turn off heat.  Drain and discard all liquid.

    flash cooked ribs for Kalbijjim

    flash cooked ribs

  7. Make the sauce by mixing all sauce ingredients listed above EXCEPT for 3 T soy sauce, 1 tsp honey, 2 T sesame oil. You will be adding the additional soy sauce, honey and sesame oil to taste later on.

    Sauce for Kalbijjim

    Sauce for Kalbijjim

  8. Add sauce to pot. Turn heat to med-high and cook ribs in sauce for 5 min.

    kalbijjim with sauce

    kalbijjim with sauce

  9. Add 5 C water and bring back to boil.
  10. Add radish and additional green onion for extra flavor. Simmer for 30 min.

    Kalbijjim beginning

    Kalbijjim beginning

  11. Mushrooms should be fully soaked by now. Rinse and quarter shitake mushrooms like so.

    shitake mushrooms

    shitake mushrooms

  12. If using canned chestnut, just drain. If not, you will have to peel your own.. :( Nice thing about Korea, many markets peel raw chestnuts for you for free when you buy a bag. Here’s how they look -

    peeled raw chestnuts

    peeled raw chestnuts

  13. After simmering for 30 min., add carrots and mushrooms. Continue to simmer.
  14. After 20 min or so, add chestnuts. Optionally add dried jujube dates.
  15. Simmer for another 1 hr or so (total 1:50 min~ 2 hrs) until the meat is fully tender. Best way to check the tenderness is to tear a little piece off and taste.
    Testing Tenderness of Kalbijjim meat

    Testing Tenderness of Kalbijjim meat

    I am holding up this piece of Kalbi with tongs after simmering for 90 min. You can see that it’s not falling off which means it still has another 20~30 more mins to go.

  16. When it’s almost done, taste the meat to see how you like it. Add more soy sauce (up to 2 T) and touch of honey (1 tsp) to taste.
  17. Kalbijjim produces a LOT of fat and you need to skim the fat before you serve. My tip for trimming off fat is to cool the stew in the fridge for several hours or in colder climates, leave it outside.
    Kalbijjim cooled with fat

    Cold Kalbijjim with fat solids

    See how much fat has solidified overnight in Korean winter!

    kalbijjim solid fat thickness

    kalbijjim solid fat thickness

    Now just break off fat pieces and discard them. You can easily remove fat from Kalbijjim or any other stew using this method without a lot of fuss.

    Fat solids removed from Kalbijjim

    Fat solids removed from Kalbijjim

    Yup – that’s quite a lot of fat…good thing we removed it all. :)

  18. After removing the fat solids, add 2 T sesame oil and reheat Kalbijjim before serving.

So here is the final closeup of my yummy Kalbijjim -

Galbijjim/Kalbijjim (갈비찜)

Galbijjim/Kalbijjim (갈비찜)

In my opinion.. 

  • Most Korean recipes will tell you to soak the beef in cold water and let it bleed out. Recipes say that the meat will smell bad otherwise. But in my opinion, you don’t need to do it unless the beef is especially gamey tasting. I think this was the case in the old days because many beef in Korea was from cows that worked the field which means they had a lot of muscle and was grass fed. I never really followed the advice for the last 20 years in the US and never had a problem. And the same here in Korea so I think I can say it’s safe to ignore it.
  • Some Kalbijjim recipes add gingko nuts. Personally I don’t like the taste of it but you are welcome to try. It’s supposed to be good for your brains!

Leftovers..

  • Save every bit of leftover Kalbijjim liquid and make Kimchi Jjigae with it. You will end up with a very hearty Kimchi Jjigae~

Storage

  • Freeze leftovers for later. It will reheat nicely. Vegetables will be a bit mushy though.

Enjoy!


Seafood Green Onion Pancake (Dongrae or Haemul Pajeon 동래 해물파전)

$
0
0
DongraePajeon 동래파전 (Korean Seafood Green Onion Pancake)

There was a special kind of Haemul (Seafood) Pajeon (파전) that was served at fancy parties at our home when I was little, many years ago… And I have been looking for the recipe of this very yummy seafood green onion pancake for a long time. I did not have the recipe because it is not a dish that my mom or dad made but it was a dish that was made by a professional chef who came to cook for my parent’s Diplomatic dinner parties. Mrs. Shim was her name and all her food was just really delicious.

So when we had these dinner parties,  I waited and waited until dinner was all served (at least 9pm or so?) so I could have the leftovers because they were all so good. I prayed that the guests had small stomachs or was too proper and did not ask for seconds.. :) Also another way I got to taste Mrs. Shim’s food was to hang around in the kitchen all day and seek opportunities for tasting or cleaning up defective pieces that did not meet her standard.

This special kind of Haemul Pajeon is called Dongrae/Dongnae Pajeon (동래파전)- named after the region of Dongrae/Dongnae which is basically the area of the city of Busan today. For some reason, this pancake loaded with green onions and tons of seafood has lost popularity over the years and I almost forgot about it. But recently, I was reminded of this fabulous pancake when my nephew SW bragged about the delicious Dongrae Pajeon made by his wife EH who is from Busan. So.. thank you EH for the inspiration!!

Unlike the common, everyday Korean Pajeon (Green Onion Pancake) which is made by just mixing everything together – batter, seafood, vegetables and all – Dongrae/Dongnae Pajeon is made in several steps or layers which is more work but definitely worth the effort. It is much more flavorful because there is less batter and more seafood and tons of green onions.

Is your mouth watering yet? Mine is… ;) Let’s get cooking then –

OH! BTW – I provide 2 sauces in the recipe but you can certainly make just one. Chokanjang is the usual soy sauce served with most Korean Pancakes but try Chogochujang, I made it at the suggestion from my nephew’s wife and I was surprised how good it tasted together!

Servings: 3 pancakes (6×4 in)     Cooking Time: 40       Difficulty: Medium

Ingredients for Seafood Green Onion Pancake (Dongrae/Dongnae Pajeon)

  • 7 oz (200 g) young green onions (approx 2 bunches), thinner the better
  • 2 oz (50 g) minari/water dropwort or water cress – optional
  • 4 oz (100 g) small shrimps (frozen is fine)
  • 4 oz (100 g) bay scallops and/or chopped clams
  • 3 oz (75 g) ground beef
    • 2 tsp soy sauce (진간장 jinkanjang)
    • 1 tsp plum syrup (maesil extract 매실액) or 1/2 tsp sugar
    • 1 tsp mirin or rice wine or sake
    • 1/2 tsp sesame oil
    • 1/2 tsp chopped garlic
  • 1/2 C (50g) regular flour
  • 3/4 C (150g) rice flour
  • 1/4 C (50g) sweet rice flour
  • 1 tsp salt
  • 1 ~ 2 egg
  • vegetable oil for pan frying
  • 2 C (360 ml) anchovy stock or water
  • Chokanjang (sour soy sauce)
    • 1 Tbs soy sauce
    • 1 Tbs vinegar
    • 1 Tbs water
    • 1/2 tsp sugar
    • sprinkle of sesame seeds
  • Chogochujang (spicy sweet red pepper sauce)
    • 1 Tbs Korean Gochujang (red pepper paste)
    • 1 Tbs vinegar (rice wine or white) or 1 Tbs lemon juice
    • 1 1/2 tsp sugar
    • sprinkle of sesame seeds

*** If scallops or shrimps are frozen, thaw them in the fridge for several hours or overnight.

  1. Make Chogochujang sauce by mixing gochujang, vinegar, sugar and sesame seeds.
  2. Make Chokanjang sauce by mixing soy sauce, vinegar, sugar and water. Set aside.
  3. Clean green onions and minari. Cut green onions 6 in (15 cm) long.This is usually 1/2 of the full length of green onions sold in US.
    cleaned minari and green onions for Pajeon
    cleaned minari and young green onions for Pajeon

    The green onions used for Pajeon should be young and tender – called 실파(shilpa) in Korean. If your green onions are any thicker than 1/2 in (1 cm) then cut it in half or smash the white part with the side of your knife to make it tender.

    Smashing green onions for Pajeon
    Smashing green onions for Pajeon

  4. Cut minari 3 ” (7 cm) long. About 1/2 length of your green onions. Reason for cutting minari shorter is because they are quite fibrous and will be too chewy if left too long. Normally, only minari stems are used but these minaris are quite young and tender so use the leaves too. Use minari leaves as garnish and serve on the side to add a touch of freshness to your pajeon. (See serving suggestion pic at the end of post)

    Cutting minari/water dropwort for Pajeon
    Cutting minari/water dropwort for Pajeon

  5. My thawed shrimps (pre-cooked) and bay scallops. Bought frozen from the Korean market. Cute aren’t they?

    Thawed shrimp and scallop
    Thawed shrimp and scallop

  6. Chop the scallops and shrimp roughly into big chunks.
  7. Season the ground beef by adding the soy sauce, mirin, maesil syrup or sugar, chopped garlic and sesame oil.
  8. In a small bowl, whisk egg.
  9. In another bowl, make the batter by mixing flour + rice flour + sweet rice flour and anchovy stock. Rice flour likes to settle to the bottom so stir it well and be sure to stir right before you use it.
  10. Now we are ready to make the pancake! You should have all the prepared ingredients next to your pan like this (minus oil) –

    Dongrae Pajeon (Korean seafood Pancake) ingredients
    Dongrae Pajeon (Korean seafood Pancake) ingredients

  11. Heat a nice thick pan (cast iron is great) on med-high heat. Pour about 2 T oil into pan.
  12. Layer green onions in pan and then minari on top:

    Green onions and Minari in pan
    Green onions and Minari in pan

  13. Pour batter over green onions and minari. DO NOT try to cover all the green onions with the batter – you will end up adding too much batter. Pancake will taste doughy if you have too much batter.  Pour about 2-3 Tbs per pancake – just enough for green onions to hold together.

    green onions and minari with batter
    green onions and minari with batter – do not add too much batter

  14. Quickly (lower heat to med. if you think it’s burning) dot the pancake with ground beef + scallops + shrimp. Using your hands works best – just be careful!

    Seafood and Beef on Green Onion pancake (Pajeon)
    Seafood and Beef on Green Onion pancake (Pajeon)

  15. Top with 1/3 of whisked egg (pancake on the right). If you like eggs, you can use up to 1 whole egg per pancake.
  16. Turn the pancake over to cook the other side.

    Pajeon turned over
    Pajeon (Green Onion Pancake) turned over

  17. Let it cook for another 2 min or so until pancake is nicely browned.
  18. And there it is!

    Dongrae Pajeon with Chogochujang
    Dongrae Pajeon – Korean Seafood Green Onion Pancake with Chogochujang

Serving Suggestions

  • This Dongrae Pajeon (Korean Seafood Green Onion Pancake) pairs wonderfully with Korean Rice Wine – Makgeolli/Makgeoli/Maguli (막걸리) so you must give it a try!!

Variations for Haemul Dongrae/Dongnae Pajeon

  • Original version includes chopped clams so if you can add it, it should be good
  • Calamari, mussels, oysters are also great additions or substitutions
  • Just use 3/4 C flour and 3/4 sweet rice flour to make the batter if you don’t have regular rice flour


Hearty Soy Sauce Chicken Stew (닭도리탕 Dak doritang)

$
0
0
Korean Chicken Stew (닭도리탕 Dakdoritang)


I am sure you can agree that great recipes are the ones that are easy and tasty all at the same time. But unfortunately there is not a whole lot of them. But I am happy to report that this recipe is one of those!  This recipe is based on a blog post by a Korean blogger who wrote about how she learned it from her Grandma. But she did not have any measurements! Just a list of ingredients. I guess Grandma is not used to using Tablespoons and Cups.. Oh well..that’s where I come in I guess.

So, this Dak doritang(Korean soy sauce chicken stew – also called Dakbokkeumtang) recipe was so easy to make, it actually made me nervous the first time I made it. Is that it? That’s all the ingredients? Don’t I need to add other seasonings?? But having a new found respect for Gook Kanjang/Guk Kanjang/Kuk Ganjang during my stay in Korea, I decided to go with it. I simply had to trust that it will do its magic.

Anyway,  I am glad I stuck to it. The taste of the chicken stew may not throw a big punch in your first bite like many restaurant versions but the more you eat it, the more you are tasting the true hearty, simple taste of Korean food at home. Take a spoonful of the warm stew broth along with some potato and you will see what I mean. Happiness all the way from your mouth to your tummy. :)

I tried making this Korean chicken stew (Dak doritang) several times over the years because it is another one of my favorite dishes from my childhood.  But I was never totally happy with it. It just did not taste the same as the one I tasted at home when I was a kid. The one I remember was not red nor spicy and yet so flavorful and delicious – not like the overly spicy, red dak doritang(닭도리탕) /dak bokkeumtang (닭볶음탕) that is commonly served today.

It’s not like I am against red, spicy dishes but sometimes, even as a Korean, I get tired of eating dishes that kind of taste the same – spicy, sweet and salty all at the same time.  Sometimes the seasoning is so strong, you can hardly tell what the main ingredient is. But this dish is not like that. If you have never tried Korean food before, along with Bulgogi and Kalbi, this will be a great dish to try as your first dish.

Let’s get cooking then –

Servings 6             Time: Prep 5 min  Cook 45 min          Difficulty: Easy

Ingredients for Korean Soy Sauce Chicken Stew (Dak doritang)

  • 2 lb (1 kg) chicken pcs with bone
  • 3 medium carrots (I used colored carrots)
  • 8~9 small colored potatoes
  • 3~6 fresh Korean green chili peppers or 2~3 dried red chili pepper
  • 1 large onion
  • 1 T chopped garlic
  • 5 T guk kanjang
  • 1~2 T mirin or white wine
  • 1 T jin kanjang (dark soy sauce)
  • 4 C water
  • dash x 5 black pepper


chicken for dak doritang
  • Prepare chicken by removing excess fat and most of the skin. I bought a whole chicken and cut into pieces but you can buy whatever pieces you like. But try to buy some with bones so your broth will taste yummy. Score big and thick pieces like thigh, drumstick and breasts so the flavor will get into the meat.

    Chicken with soy sauce
    Chicken with soy sauce

  • Add chicken to stew pot and add 5 T Gook Kanjang + 1 T Jin Kanjang. Mix it well.

    Chicken in pot with water for Dak doritang
    Chicken in pot with water for Dak doritang

  • Add 4 C of water and 1 T garlic. Bring to boil.  Cover and cook for 15 min on medium high heat.

    Vegetables for Korean chicken stew (Dak doritang 닭도리탕)
    Vegetables for Korean chicken stew (Dak doritang 닭도리탕)

  • Meanwhile, wash and clean potatoes, carrots, onion and green chili peppers. Cut into big chunks because they will be cooked for a long time. I used small colored potatoes so I didn’t cut or peel them. But if using large potatoes like russet, peel and cut. Take the stem off of chili peppers.

    Chicken with vegetables for Dak doritang
    Chicken with vegetables for Dak doritang

  • Add the beautiful carrots and potatoes to the pot. Lower heat to medium and cook for 20 min.

    Boiling Dak toritang (Korean Chicken stew with soy sauce)
    Boiling Dak toritang (Korean Chicken stew with soy sauce)

  • Add the green chilis and about 5 dashes of black pepper (1/8 tsp). Raise heat back to medium high and cover, cook for 10 min more to infuse the chili flavor into the stew.

    Dak doritang (Korean Chicken Stew)
    Dak doritang (Korean Chicken Stew)

  • Now we are ready to eat! Just get a bowl of rice and some kimchi and you will have a very hearty and happy meal. Enjoy!!

Cold Jellyfish Salad (Haepari Naengchae 해파리 냉채 ) with starflower

$
0
0
Korean Cold Jellyfish Salad (Haepari Naengchae) www.kimchimari.com
Korean Cold Jellyfish Salad (Haepari Naengchae) with cucumber, carrots, shrimp and meyer lemon.

Really? Jellyfish?? Can you eat jellyfish? Yes, of course. Why not?..I don’t think it’s that different than eating squid..I am pretty sure that I tasted jellyfish even before I knew what it was. And don’t worry about the jellyfish poison, the tentacles are all removed before they are packaged.

If you eat the jellyfish without thinking about it, it is pretty darn good. It actually doesn’t have any strong flavor but has great texture; it’s a little bit chewy and a little bit crunchy. It’s kind of like chicken cartilage.  I think it’s one of those things where you either love it or you don’t. My husband is not a jellyfish or cartilage guy but I love both!

If you can’t get jellyfish or you just don’t like it, omit the jellyfish.  Cheonsachae (천사채) can be also be a great substitute because it has similar texture and not much of a particular flavor. Cheonsachae (Angle Noodle or Seaweed Noodle) are Korean half-transparent noodles made from the jelly-like extract left after steaming kombu, without the addition of grain flour or starch. (wikepedia). Both jellyfish and Seaweed Noodle are very low calorie food, so it’s also great for your diet!

Korean Jellyfish Salad (Haepari Naengchae) is an essential dish to any Korean party menu. Especially in the summer, served cold, it pairs wonderfully well with rich foods like Kalbi and other grilled meats, fried dishes like Yache Twigim and/or various Jeons like Beef and Perilla. You will agree with me that a respectable Korean banquet is never complete without Jeons!! Although I kind of think Jeons take a looong time to make and you end up with just one dish.

Anyway, jellyfish salad is also a great dish to prepare beforehand, keeping chilled in the fridge and you only need to assemble when the guests arrive. I LOVE dishes like that, don’t you? When preparing a party menu, it’s not a matter of how many dishes you have, it’s how they all work together.

Traditional Haepari Naengche only uses cucumber and jellyfish and only uses vinegar for the sour taste. But I have a beautiful Meyer Lemon tree in my back yard and I just love the freshness a lemon brings to the dish, so I added some lemon. And it came out even more delicious! Many newer recipes add more colorful vegetables like red bell peppers but I decided to add carrots as my twist to the dish. I think carrots add more substance and texture that can stand up to the jellyfish pretty well.

Servings: 4               Cooking Time: 1 hr (inactive 45 min)            Difficulty: easy

Ingredients

  • 6 oz (170 g) salted jelly fish (haepari)
  • 1 english cucumber, julienned
  • 2 small or 1 medium carrot, julienned
  • 2 T rice vinegar
  • 1 T sugar
  • Dressing
    • 1 T rice vinegar
    • 1 T sugar
    • 2 tsp dry oriental mustard + 1 T water
    • 1 T meyer lemon (2 tsp regular lemon)
    • 1 tsp salt
  1. Korean Jellyfish usually comes in a bag, heavily salted for preservation. Rinse jellyfish with water couple times to get rid of all the salt and let it soak in cold water for about 45 min.

    Rinsed jellyfish for Korean jellyfish salad (haepari naengchae)
    Rinsed jellyfish for Korean jellyfish salad (haepari naengchae)

  2. While the jellyfish is swimming in water, julienne cucumber. A technique that many Korean chefs use is to first peel away the outer skin and flesh part of the cucumber, omitting the seeded center.
    Korean cucumber julienning technique
    Korean cucumber julienning technique – peeling outer layer
    julienning cucumber using Korean technique
    julienning cucumber using Korean technique

    It is called “dolyeo kkaki( 돌려깍기)” in Korean which means to shave in circular fashion. I am usually not a huge fan of fancy cutting techniques just for the sake of being fancy but this one has a purpose because it keeps only the very crunchy part of the cucumber.

  3. Julienne carrots into similar sizes. I used yellow and purple carrots here but you can use whatever carrot you like.

    carrots and cucumber julienned for jellyfish salad
    carrots and cucumber julienned for jellyfish salad

  4. I am using pre-cooked frozen shrimp here again. Just thaw and then halve the shrimps lengthwise.
    Sliced shrimps for Korean jellyfish salad
    Sliced shrimps for Korean jellyfish salad

    You are welcome to use fresh shrimp if you’d like, just cook, peel and slice similarly.

  5. Make the oriental yellow mustard paste by mixing 2 tsp dry mustard powder with 1 T water.
    Korean yellow mustard (Gyeoja) made from Oriental Mustard powder www.kimchimari.com
    Korean yellow mustard (Gyeoja/Kyeoja) made from Oriental Mustard powder

    Leave it alone for 4-5 min or more for the flavor to fully develop. If you’re too lazy to make the paste, use the yellow mustard tube but be prepared to use lot more of the paste because the flavors are just not as full bodied and strong as the powder.

  6. When the jellyfish has been in the water for over 40 min, boil some water (3 cups?). Rinse and drain jellyfish into a steel or silicone colander (because you will be scorching the jellyfish with boiling water). Pour boiling water onto the jellyfish evenly and they will shrivel up like this!
    Jellyfish flash cooked with boiling water
    Jellyfish flash cooked with boiling water

    Be careful and DON’T COOK the jellyfish!! Just SHOCK it so that jellyfish (haepari) gets even more crunchy and less chewy. Some recipes use jellyfish without this step and it will still be OK but I think this really gives a better texture.

  7. Season jellyfish with 2 T vinegar and 1 T sugar and marinade for at least 10 min. You can leave in the fridge overnight and  it will taste even better the next day.  NOTE:: Sometimes jellyfish can smell a little bit. What to do if the jellyfish smells a little bad? Add some extra lemon or even add a bit of gingerale or sprite to the marinade to help get rid of any unwanted smell.
  8. Make dressing by mixing mustard, vinegar, sugar, lemon juice and salt and set aside.
  9. Serve chilled, either all the ingredients separately and mix with dressing at the table
    different ways of serving Korean jellyfish salad (haepari naengchae) www.kimchimari.com
    different ways of serving Korean jellyfish salad (haepari naengchae) with meyer lemon slices and borage flowers

    or toss everything together and serve. Hope you enjoy it with your friends and family this summer! Let me know how you like it!!

Few more things..

So what are the purple flowers in the water bowl and also on top of the jellyfish salad (haepari naengchae)? It’s Starflower (aka Borage)! A new exciting discovery for me!! A great find at my local Whole Foods. They where selling this in a pot this spring, I brought it home and planted it. Did you know that these cute purple flowers are edible and taste like cucumbers?!! It’s actually eaten in salads and as tea in Mediterranean cuisine. So I added some Borage petals to my Haepari Naenchae for added cucumber flavor and for added prettiness. :))

Borage plant growing in my backyard
Korean jellyfish salad (Haepari Naengchae) with lemon and borage petals
Korean jellyfish salad (Haepari Naengchae) with lemon and borage (starflower) petals

Tips

  • Prepare jellyfish and cucumber, carrots separately, a day ahead of any party.
  • Additional ingredients to add – cooked egg strips (jidan), imitation crab meat.
  • Add freshly chopped garlic on top and some red chili pepper oil for extra zing!

Easy and Pretty Millle-Feuille Nabe (Shabu Shabu)

$
0
0
Close up of Mille-Feuille Nabe (shabu shabu) with layers of cabbage, perillla and beef - ready to be cooked! - www.kimchimari.com
Close up of Mille-Feuille Nabe (shabu shabu) with layers of cabbage, perillla and beef – ready to be cooked!

Shabu Shabu (see my Shabu Shabu Korean Style recipe) and really good Japanese Nabe was one of the foods I missed the most when I first came to US some 20+ years ago.  Although these foods have origins in Japanese cuisine, just like how Pizza has totally become part of American food, shabu shabu and nabe have become very much a common food in Korean food scene. In Gainesville, Florida (where I lived as graduate student with my husband) there was no restaurant that served good Japanese or Korean at the time. In fact, in those days, there were very few Asian restaurants to begin with. I think Gainesville only had 1 Korean restaurant, 2 Japanese restaurants and a few Chinese restaurants in the early 90’s.  But definitely no restaurant served shabu shabu or good nabe (stew).

We sometimes drove for hours to Orlando or Jacksonville in search of some better Korean food, only to be disappointed a lot of times because it was not what I was imagining and hoping to taste. Kimchi jjigae that used kimchi that was not sour tasting and was seasoned with vinegar to imitate the taste, japchae/chopchae that was refrigerated and reheated, fish maewoontang that used frozen fish, I mean.. it kind of upsets me even now just to think about those bad Korean foods that we ordered and ended up paying with our precious grad student stipends. This is probably why I ended up learning to cook so many Korean dishes at home because there was no other way to eat them.

Now jumping 20 years ahead in time, in 2014, while I was in Korea, I was watching one of my favorite TV program on the Korean cooking channel Olive which was 오늘 뭐먹지? (Ohneul Mwo Meokji?). It means “What shall we eat today?” It’s a show hosted by two famous Korean celebrities: Sung Si-kyung (singer) and Shin dong-yup (comedian). They invite chefs and cooks from various restaurants to learn their famous dishes by cooking together. I liked the show because they cook all different cuisines – Italian, Japanese, Chinese, Korean,..and you also get to see these guys goof things up even though they try to really follow the instructions. And one time I saw this Mille-Feuille Nabe (Shabu Shabu) being made on the show and I really wanted to try making it at home.

This Mille-Feuille Nabe (also called Thousand Leaves Hot Pot) not only looks pretty and taste great, it also overcomes one downside of shabu shabu – having to wait while the food is being cooked at the table. And then wait some more until the next batch is cooked…Shabu Shabu done this way means everything is cooked all at once which makes it great for large and/or impatient families. ;) Mille-Feuille Nabe (Shabu Shabu) is also great as a party menu because you can prepare everything ahead of time and just cook it right after your guests arrive. Recipe here is a modified and more accurate version as some parts don’t have any exact measurements and they also use some ready made sauces that are not easily available outside of Korea.

Servings 4                   Cooking Time: 40 (prep 30 min)                    Difficulty: Easy

Ingredients

  • 1 lb (450 g) very thinly sliced beef – prime rib eye for shabu shabu
  • 1 napa cabbage
  • 1 – 2 package perilla leaves (25 – 30 leaves)
  • 3 dried shitake mushrooms
  • 3.5 oz (100g) 1 pack Brown Beech Mushrooms (Buna Shimeji)
  • 3 oz (85 g) 1 pack Enoki mushrooms
  • 6 oz (170 g) 1/2 pack bean sprouts
  • 2 green onion
  • 1 pack of Konnyaku or Miracle Noodles
  • 1 lemon (for sauce)
  • For Stock
    • 10 Cups (2.5 quart, 2.3 liter) water
    • 1 piece dried kelp (다시마 dashima) about 4 x 3 in (10 x 7 cm)
    • 15 pieces dried anchovies
    • 1 big piece of radish ( palm size, 1 in (2.5 cm) thick)
    • 1/2 onion
    • 2 dried shitake mushrooms
    • Season to taste later with 1 Tbs dark soy sauce, 1~2 tsp sea salt
  • For Sauce
    • 1 Tbs regular dark soy sauce
    • 1 Tbs rice vinegar
    • 1 Tbs lemon juice
    • 1 Tbs chopped lemon peel
    • 1 Tbs chopped fresh garlic (optional)
    • 2 Tbs anchovy stock (from above)
    • 1 Tbs maesil syrup (plum extract syrup) or 2 tsp sugar
    • 1 Tbs chopped Korean green chili pepper or any other green chili
  1. Soak dried shitake mushrooms in warm water to fully rehydrate.
  2. Start stock by adding water, radish, anchovies, kelp, dried mushroom, onion to stock pot. Bring to boil and quickly lower to simmer. Simmer (should NOT be bubbling) for at least  30 min and season with 1 Tbs soy sauce and 1~2 tsp sea salt to taste. It should taste slightly under seasoned. Cool.
  3. Clean, wash cabbage and rip out the outer bigger leaves. Drain.
  4. Clean perilla leaves, bean sprouts, green onions and mushrooms. Shitake, Enoki, Brown Beech Mushrooms go in this recipe because they maintain great texture even when cooked. Shitake especially has great flavor!

    Ingredients for Shabu Shabu Mille Feuille (Shabu Shabu Nabe Style) www.kimchimari.com
    Ingredients for Mille-Feuille Nabe (shabu shabu)

  5. Now let’s make some shabu shabu mille feuille (thousand leaves)!! Start stacking by layering cabbage leaf -> perilla leaves -> shabu shabu beef. Like So –
    Layering cabbage, perilla and beef for mille-feuille nabe (shabu shabu) www.kimchimari.com
    Layering cabbage, perilla and beef for mille-feuille nabe

    The beef slice used here is what’s sold as Chadolbaegi (see my Know your beef cut! post for more info on Korean beef cuts). Usual Chadolbaegi cuts have more fat but this one didn’t. The original recipe uses both chadolbaegi (brisket cut against the grain) and rib eye cuts. I only wrote rib eye in the ingredients list because I found these chadolbaegi slices can get a little tough since there is little fat. If you want to have tender, melt in your mouth beef slices, use well marbled rib eye or tenderloin instead.

  6. REPEAT cabbage -> perilla -> beef until you have 2 sets and then top with cabbage.
    nabe mille-feuille stack with rib eye
    shabu shabu mille-feuille stack with rib eye

    Mille-feuille stack with cabbage, perilla and beef - completed for Thousand Leaves Nabe
    Mille-feuille stack with cabbage, perilla and beef – completed for Thousand Leaves Nabe

  7. Cut the cabbage stack into about 2 to 2.5 in (5 – 6.5 cm) slices. Adjust width according to how deep your pot is.

    cutting mille-feuille stack for thousand leaves hot pot (nabe)
    cutting mille-feuille stack for thousand leaves hot pot (nabe)

  8. Layer the bottom of the pot with bean sprouts. Add more or less bean sprouts to adjust the height of the stacks. Turn stack sideways and fill up the pot from the edges and work your way towards the center.  It looks most pretty when the stacks fill up almost to the top of the pot and the stacks are staggered.
    filling up pot for mille feuille hot pot (nabe)- www.kimchimari.com
    filling up pot for shabu shabu mille feuille (nabe)

    filling up pot for shabu shabu mille feuille nabe- kimchimari.com
    pot almost filled for shabu shabu mille-feuille nabe with center empty

  9. Now, add mushrooms in the center.

    easy and pretty shabu shabu mille-feuille nabe - kimchimari.com
    easy and pretty shabu shabu mille feuille nabe

  10. Add anchovy stock until the ingredients are almost covered and top with some gonnyaku (miracle) noodles.
  11. Cover and bring to boil on med high heat. Uncover and keep cooking on med high heat for 10 min or until the cabbages are soft.

    mille feuille nabe (shabu shabu) boiling with green onions and gonnyaku noodles added
    mille feuille nabe (shabu shabu) boiling with green onions and gonnyaku noodles added

  12. While you wait, peel and chop some lemon skin. Also squeeze fresh lemon juice. To the lemon peel and juice, mix in soy sauce, vinegar, sugar or maesil extract, stock, chopped green chili and garlic.

    sauce for mille feuille nabe with lemon, soy sauce, garlic and green chili
    sauce for mille feuille nabe with lemon and soy sauce

Now you are ready to serve!!!

individual serving of mille-feuille nabe (shabu shabu) with broth

Above is an individual serving of Mille-Feuille Nabe (Shabu Shabu) with broth, garnished with fresh perilla and enoki mushrooms.

Serving suggestions

  • For a party, assemble the ingredients ahead of time in the pot and also make the stock and keep them separately refrigerated up to a day. Take out the pot and the stock about 1 hr before and bring to room temperature. 10 min before guests are ready to eat, boil the nabe or cook at the table.
  • Serve the sauce in individual sauce bowls so guests can dunk in the sauce before eating.
  • Either buy or serve creamy peanut sauce in addition.
  • Kimchi or a spicy, garlicky dish goes great with this nabe.
  • Some people may prefer to have more meat – double up on the meat for extra meaty flavor.
    Mille Feuille Nabe (shabu shabu) ready to cook - www.kimchimari.com
    Mille Feuille Nabe (shabu shabu) ready to cook

    smaller mille-feuille nabe with sauces www.kimchimari.com
    smaller individual serving size mille-feuille nabe with sauces


Best Korean Summer BBQ Party – Menu and Tips

$
0
0
Lily of the nile in purple jar

Lily of the nile in purple jar

Koreans LOVE BBQ in the summer. In Korea, when you visit the various parks, mountains and rivers, you will see that Koreans will find a way to grill everything, whenever and wherever they are. Most Korean pensions (Korean’s version of Bed and Breakfast but without breakfast) will usually have picnic areas that allow BBQ and may even provide BBQ fire pits for a fee. It is almost unimaginable for Koreans to have a outdoor event without having some sort of a BBQ.

Anyway, we recently threw a BBQ party for my daughter’s birthday in our backyard. She originally said she was thinking about 8 – 12 people but then while I was gone to Lake Tahoe,  it suddenly became 17!!!  Yikes!! I mean, a few years ago, that would not have been a problem at all…but I have not cooked for this many people in a while so I knew I had to keep it simple. Cooking for 17 young adults is not an easy feat – especially if you are going to make most of it alone.

As with any party, the key is to come up with the right menu, distributing the cooking over time (it’s hard to cook everything in one day) and then also planning things well so that each dish is served at their right temperature. Some need to be cold, some need to be piping hot and some can be at room temperature.

So here’s the party menu – Kalbi is the only dish that need to be kept very warm.

  • BBQ Kalbi (Korean Ribs)
  • Potato Salad Korean style (Gamja Salad)
  • Radish Salad (Moosaengche)
  • Kimchi
  • Rice
  • Perilla Green Onion salad -This is basically a lazy man’s ssam (lettuce wraps) because you don’t have to wrap it
  • EXTRA Veggies with Ssam Jang-  if you want, you can serve some fresh green chili peppers (Annaheim peppers are great because they are not too spicy hot), bell pepper and cucumber sticks with some Ssam jang as dipping sauce.

1 day BEFORE party 

Marinate Kalbi: Calculate about 1/2 lb per person if using bone-in LA style, thinly cut short ribs. But when cooking for large party, these bone-in LA style Korean Ribs are a lot of work because you have to rinse each piece to wash away tiny bone fragments. So I bought Boneless Beef Short Rib Meat sold at Costco. It comes in pretty thick pieces so I sliced it into thinner pieces about 1/2 in thick.

Make marinade using following recipe –

PER POUND(lb) of Rib Meat, mix following and marinate the meat overnight in the fridge.

  • 3 T soy sauce (Kikoman)
  • 2 T sugar
  • 1 T honey
  • 2 T red wine [ or sake ]
  • 1 T sesame oil
  • 2 T minced garlic
  • 1 t ground black pepper
  • 2 t toasted sesame seeds
  • 1 T chopped or thinly sliced green onion
  • 1 T chopped kiwi  (An emergency fix is to add 2 T or so of diet coke if you find that the meat is too tough and no time to marinade for hours beforhand)

Tip: Make sure you add some kind of tenderizer like kiwi, pear, pineapple or even coke for Kalbi because the rib meat is really flavorful but can be a quite chewy. I did not have kiwi so I did not add it and regretted it. Flavor was great but meat was a little too chewy. Lesson learned again.

Korean Beef Ribs (Kalbi) marinated

Korean Beef Ribs (Kalbi) marinated

Moosaenche: Moosaengche can be made using my moosaengche recipe, 1 day ahead. Store in the fridge. It actually taste better when it has time to pickle a little bit in the fridge.

The Day of party

How to make Korean Potato Salad (Gamja/Kamja Salad 감자 사라다):

Serves about 15:

  • 6 russet potatoes, peeled and cut into large chunks
  • 3 carrots, peeled and cut into large chunks
  • 1 large english cucumber or 3-4 pickling cucumbers, cut into cubes
  • 2 -3 fuji or red delicious apples, peeled, cut into cubes
  • 4 eggs, hard boiled, peeled and cut into cubes
  • 1/3 ~ 1/2 Cup Mayonnaise (depends on your taste)
  • Peel and boil russet potatoes and carrots in lightly salted water. Hard boil eggs.  Cook potatoes until they start to kind of fall apart. Cook carrots and eggs. Cut them into cubes. Cut cucumbers and apples roughly into cubes.
  • Once the potatoes and carrots are cooled, toss everything in Mayonnaise. Season by adding more salt if needed. Keep it refrigerated until ready to serve.
  • So simple yet so delicious when eaten with Kalbi. Extras – some like to add grapes or rasins.

    Korean Potato (Gamja/Kamja) Salad

    Korean Potato (Gamja/Kamja) Salad

Cook Rice – I made about 6 cups of rice with brown rice and that was enough.

Perilla and Green Onion Salad (Sangchoo Kkaetnip Pa Moochim 상추깻잎파무침):

  • Wash and tear lettuce and perilla into bite size pieces. You can also cut them with a knife to make it go faster for larger amounts.
  • Cut green onion into thin strips and soak in cold water for lighter flavor. This is when the green onion curls up like I wrote in my Chapsal Bulgogi post.
  • Right before serving, toss the greens by adding a few splashes of rice vinegar, sprinkling of sugar, dashes of salt, black pepper and red chili powder. Go light on all the seasoning. It is not a stand alone dish but served as an accompaniment to Kalbi.
Korean Perilla Green Onion Salad (깻잎상추파무침)

Korean Perilla Green Onion Salad (깻잎상추파무침)

Ready to Serve!

  • When guests arrive, grill the Kalbi. Korean style is to serve it well done. If you’d like you can serve it medium or medium well. I served it in my Staub cast iron pot to keep it warm.

    Grilled Korean Beef Ribs BBQ (Kalbi)

    Grilled Korean Beef Ribs BBQ (Kalbi)

  • While the Kalbi is grilling, set the buffet table with all the other dishes including rice and Kimchi. For Kimchi, try making some easy green cabbage kimchi from my recipe – ahead of time.
    Korean BBQ party table with Kalbi, Radish Salad, Kimchi and Potato Salad

    Korean BBQ party table with Kalbi, Radish Salad, Kimchi and Potato Salad

    These next 2 photos are by one of my daughter’s friend who is an amazing young street photographer Ben Lee (www.benjmin.com). If you need a photographer for your event in the bay area, check him out! Thank you Ben for these photos!! I love how you have captured the sun shining on my food.. :))

    Party table with Chips, Guacamole and Salsa, Moosaengche, Kimchi

    Party table with Chips, Guacamole and Salsa, Moosaengche, Kimchi – courtesy Benjmin Photography

    Korean Vegetable Platter with Ssam Jang

    Korean Vegetable Platter with Ssam Jang

    Raw carrots, cucumbers and green chili peppers all taste great with Ssam Jang and goes well with Korean BBQ’s.

  • One last thing – if you want to make it even more perfect, make some Dwenjang Jjigae or Kimchi Jjigae and serve it hot. This will be just absolutely delicious and will help cut through any greasy taste of the Kalbi.

Well, hopefully this is helpful in preparing a simply, easy yet delicious Korean BBQ party for the summer. If you have any other BBQ party menu ideas, I would love to hear from you!

Enjoy your summer everyone!

  • Come visit me at my facebook page -https://www.facebook.com/pages/Kimchimari/1696601200567516
  • Also my instragram – instagram.com/kimchimari
  • And pinterest – pinterest.com/kimchimari


The post Best Korean Summer BBQ Party – Menu and Tips appeared first on Kimchimari.

Samgyetang-Korean Ginseng Chicken Soup

$
0
0
Samgyetang-Korean Ginger Chicken Soup at our local restaurant BN Chicken

Samgyetang-Korean Ginger Chicken Soup at our local restaurant BN Chicken

Is summer too hot for you? Do you feel worn out from the heat?? Well, guess how Koreans fix that?! They stand in line for hours in front of restaurants in Seoul to eat a pot of piping hot Samgyetang-Korean Ginseng Chicken Soup!!!

Samgyetang(삼계탕) is probably one of the most popular “energy” foods in Korean cuisine. And some people, like my husband, swear by it. When he has symptoms of allergy (stuff nose, runny nose, itchy eyes and sneezes), he says it’s actually not allergies but it’s because his body is cold inside. Not cold, in the sense of being chilly cold that you need a sweater but cold in the oriental medicine sense. It’s kind of feeling lethargic, weak and tired. Anyway, if he has a pot of this Korean ginseng chicken soup for dinner then he will be all better next day! 

Now, if you were in Korea right now in August with 85% humidity with over 30°C/90°F temperatures, you would not enjoy cooking samgyetang at home in the hot summer. And that’s why so many Koreans stand in line in front of restaurants to eat the soup. For at least 3 days of the summer – first day of summer (chobok), middle of summer(jungbok) and last day of summer(malbok) in the lunar calendar – Koreans must eat Samgyetang to beat the heat.

So in support of people back in Korea, we decided to visit a local Korean restaurant in Santa Clara called BN Chicken to get our fill on Samgyetang. If you like chicken, it’s a great place to eat because they have fried chicken, noodles in chicken soup (dak kalguksu) and even chicken katsu. The samgyetang chicken was a little overcooked for my taste but the broth was really hearty and yummy. And their side dishes are all pretty good too. 

kimchi banchan at BN Chicken Fresh Kimchi - BN Chicken Kkaktugi - BN Chicken

Back in 2011, I posted a recipe on how to make yeong gye baeksuk.

Yeong gye baeksuk (Korean chicken soup and rice)

Yeong gye baek suk (Korean chicken soup and rice)

Making samgyetang is very similar to making yeong gye baeksuk except for adding ginseng and stuffing the cavity. So please see my old yeong gye baeksuk post for more detailed cooking instructions on how to prepare Korean chicken soup and also discussions on differences between samgyetang (삼계탕), yeong gye baeksuk (영계백숙) and dak baeksuk (닭백숙). 

Samgyetang (삼계탕) - Korean Ginseng Chicken Soup
Serves 1
Samgyetang- Korean Ginseng Chicken Soup is Korean's chicken soup for the soul.
Write a review
Print
Prep Time
10 min
Cook Time
50 min
Total Time
1 hr
Prep Time
10 min
Cook Time
50 min
Total Time
1 hr
Ingredients
  1. 1 cornish hen (2-3 lbs/ 1-1.3 kg)
  2. 4 garlic cloves
  3. 1 medium onion
  4. 1 dried or fresh Korean Ginseng (substitute American Ginseng)
  5. 3 jujube dates (대추)
  6. 3 ginko nuts (optional)
  7. 2 green onions, chopped
  8. 1 cup soaked sweet rice (optional) - soak about 1 hr
  9. 7 cups water
  10. salt and pepper
Instructions
  1. Rinse and clean chicken. Cut off wing tips and tail end (see my yeong gye baeksuk post)
  2. Stuff chicken with sweet rice (optional) and garlic
  3. Add about 7 cups water, chicken, whole onion, ginseng and jujubes to pot. Optionally add ginko nuts.
  4. Bring to boil and then simmer for 50 min or so until meat falls off the bone.
  5. Season soup with salt and pepper.
  6. Garnish with chopped green onions and serve.
Notes
  1. To serve in clay pot, cook in a large pot first and then transfer to clay pot (ttukbaegi) and serve boiling in hot pot. Stuffing sweet rice is totally optional. Kimchi is a must side dish to samgyetang so please try it together.
Kimchimari http://kimchimari.com/
So where ever you are this summer, I hope you will get to enjoy samgyetang one way or another! 

Thank you to BN Chicken for allowing me to take photos of the food. Visit bnchicken.com for info.


The post Samgyetang-Korean Ginseng Chicken Soup appeared first on Kimchimari.

Viewing all 77 articles
Browse latest View live


<script src="https://jsc.adskeeper.com/r/s/rssing.com.1596347.js" async> </script>