
Apple Pork Bulgogi with Kale and Apple Salsa
Yes, folks.. this is Korean fusion. I never thought I would be posting a Korean fusion dish but I had to do it because it tasted soooo good. It all started because recently I saw an opportunity to enter a contest where we had to use apples to make a dish. Of course, the obvious thing to make was apple pie, apple turnovers, apple tart..etc. But I knew there are so many wonderful bakers out there that I most likely could not compete with most of them. So I wanted to use my knowledge of Korean flavors but had to make something where anyone could get a feel for how delicious it was. And I was surprised at myself of how this dish all worked out so beautifully together.
Now, if you can, it would be such an encouragement if you can all visit my instagram @kimchimari and like my submission. The contest is by KitchenAid and you can find other entries by looking for #KitchenAidContest. If I get picked to be one of the 4 finalist, I get to go to New York, get a cooking lesson with Chef Geoffrey Zakarian!!!! Wow.. I can’t even imagine how cool that would be. It would be such a HUGE prize and a confirmation for me to be part of something like that after all these years of working on my blog. The contest ends tomorrow Sept 14th 5pm so if you can do it before then, I would be so grateful. And of course, if you have an inspiration, you can also enter, there’s still time!
In addition to pork bulgogi, I do have another submission that I did on twitter because you can do different entries per social media account. My submission for twitter @jjkimchimari is Apple Braised Pork Ribs with Apple Kimchi Slaw. I will post the recipe for that very soon.
Basically, there are 3 components to this dish – the spicy apple pork bulgogi, sauteed kale and apples. And finally, the apple salsa. You may want to serve it with a bowl of rice if you want some carbs but is quite a healthy, diet friendly meal on its own. This is a completely original recipe by me and I’m quite pleased with it. Let me know how you liked it.
Servings: 3-4 Cooking Time: 1:20 Difficulty: Easy
Ingredients
- 2 lb pork (top loin center boneless extra thin cut or Korean pork bulgogi cut from neck/butt/shoulder)
- 1 medium onion, sliced
For marinade:
- 1 granny smith apple
- 2/3 or 1 thumb of ginger (about 1 Tbs grated)
- 3 garlic cloves
- 2 T soy sauce
- 1 T honey
- 2 T Gochujang (Korean red pepper bean paste)
- 2 T cooking rice wine or mirin
- 1 T sesame oil
- 2~3 T sugar (to taste)
- 1~2 tsp Korean red chili powder ( gochukaroo)
- 1/4 tsp black pepper
- 1/2 apple juice
- 1 granny smith apple, sliced thin
- 1 bunch kale, cut into strips
- 1 tsp fresh ginger
- 1-2 Tbs mirin
- salt and pepper
- 1 honey crisp apple, diced
- 1 tsp orange zest or lemon zest
- 2 Tbs purple onion, chopped
- 2 Tbs extra virgin olive oil
- 1 Tbs white wine or mirin
- 1 Tbs apple juice
- 1 Tbs rice vingear or apple vinegar
- 1 Tbs honey
- 1 Tbs green onion, chopped
- salt to taste
- Add all marinade ingredients in a blender and make a puree to make the marinade.
![Apple Pork Bulgogi marinade]()
Apple Pork Bulgogi marinade
Add gochujang and it should look like this:
![Apple gochujang pork bulgogi marinade]()
Apple gochujang pork bulgogi marinade
- Marinate pork pieces in the puree for about 15 min. or up to overnight.
- Cut onion and apple into thin slices and kale into strips.
- Make apple salsa by combining all the ingredients. Let it rest.
- Heat frying pan with oil and ginger on high heat for 1 min or less. When ginger starts to brown, add kale and apples and saute for about 2 min.
- Add mirin. Season with salt and pepper.
- Saute for 1 more min or so until kale is tender. Put Kale aside.
- In the same pan, add a little more oil. Cook pork bulgogi and onions.
- Turn pork over when it has browned.
- Serve pork on a bed of onions, then spread kale and apples around the bulgogi.
- Top with the apple salsa and there you go!!
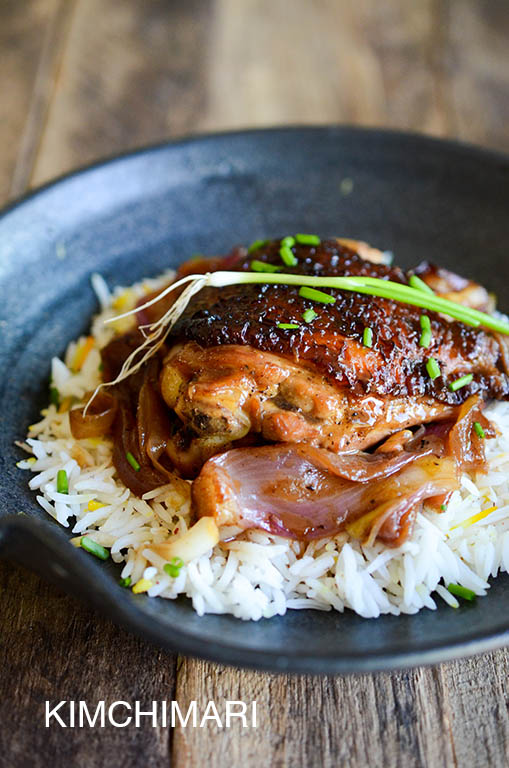
![Apple pork bulgogi with kale and apple salsa]()
Apple pork bulgogi with kale and apple salsa


- 2 lb pork (top loin center boneless extra thin or Korean pork bulgogi cut from neck/butt/shoulder)
- 1 medium onion, sliced
- 1 granny smith apple
- 2/3 or 1 thumb of ginger (about 1 Tbs grated)
- 3 garlic cloves
- 2 T soy sauce
- 1 T honey
- 2 T Gochujang (Korean red pepper bean paste)
- 2 T cooking rice wine or mirin
- 1 T sesame oil
- 2~3 T sugar (to taste)
- 1~2 tsp Korean red chili powder ( gochukaroo)
- 1/4 tsp black pepper
- 1/2 apple juice
- 1 granny smith apple, sliced thin
- 1 bunch kale, cut into strips
- 1 tsp fresh ginger
- 1-2 Tbs mirin
- salt and pepper
- 1 honey crisp apple, diced
- 1 tsp orange zest or lemon zest
- 2 Tbs purple onion, chopped
- 2 Tbs extra virgin olive oil
- 1 Tbs white wine or mirin
- 1 Tbs apple juice
- 1 Tbs rice vingear or apple vinegar
- 1 Tbs honey
- 1 Tbs green onion, chopped
- salt to taste
- Add all ingredients in a blender and blend until smooth to make the marinade.
- Marinate pork for about 15 min. or up to overnight.
- Cut onion and apple into thin slices and kale into strips.
- Make apple salsa by combining all the ingredients. Let it rest.
- Heat frying pan with oil and ginger on high heat for 1 min or less.
- When ginger starts to brown, add kale and apples and saute for about 2 min.
- Add mirin. Season with salt and pepper. Saute for 1 more min or so until kale is tender.
- Put Kale aside. In the same pan, add a little more oil.
- Cook pork bulgogi and onions.
- Turn pork over when it has browned.
- Serve pork on a bed of onions, spread kale and apples around the bulgogi.
- Top with the apple salsa and there you go!!
- Amazingly good and quite simple to prepare. Serve with a bowl of rice and it will be just so perfect. Leftover pork bulgogi (cooked or uncooked) can be frozen for later. Add more gochujang or chili pepper powder for extra kick!
Thank you!
The post Apple Pork Bulgogi with Kale and Apple Salsa appeared first on Kimchimari.

 than that?? This is another amazing recipe creation by moi for the KitchenAid’s contest. As far as I know this is totally my creation. The flavor profile certainly has Korean or Asian combination of soy sauce, ginger and rice wine. A fabulous dish for the fall, so hearty and good that you have to try cooking some this weekend.


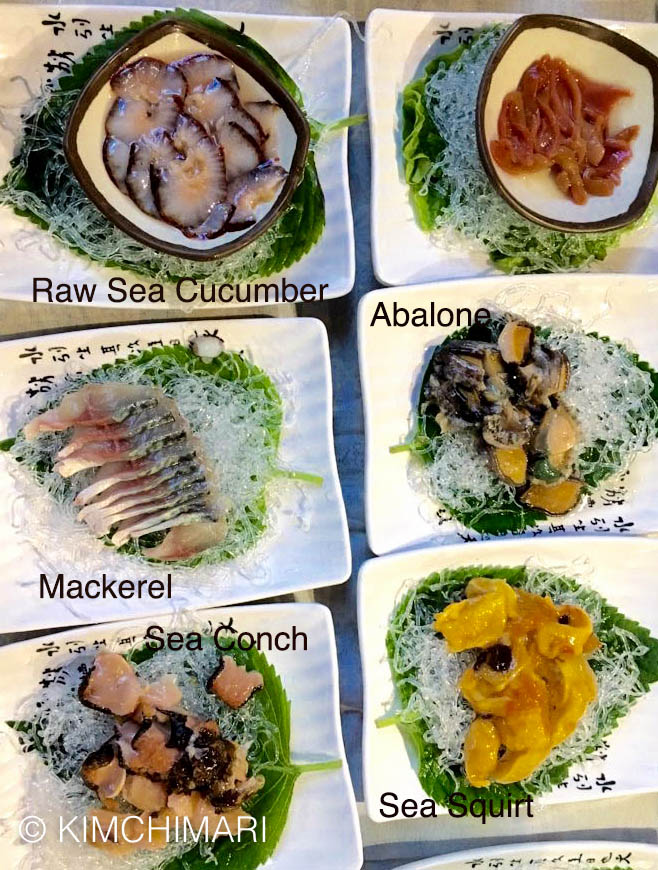
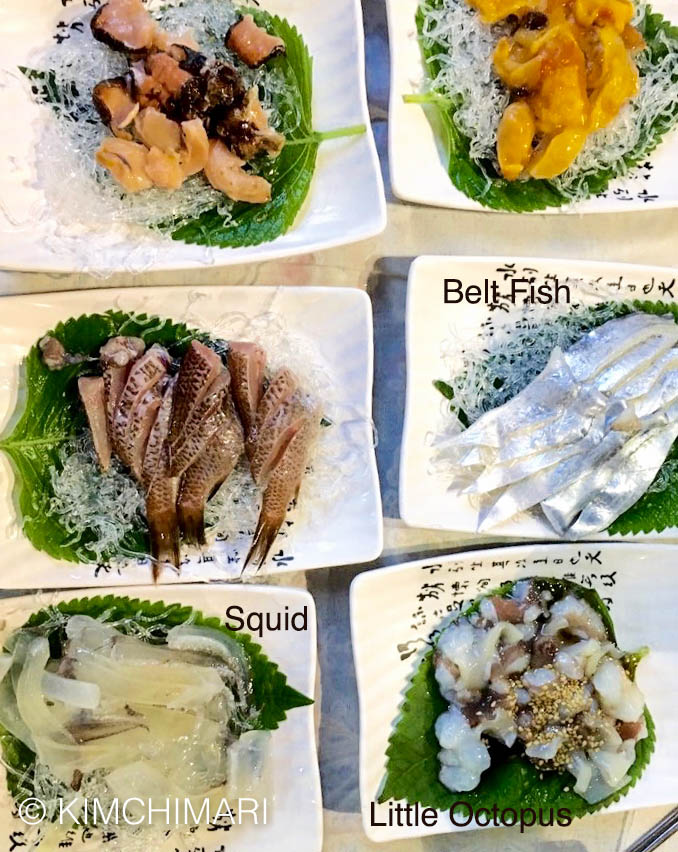
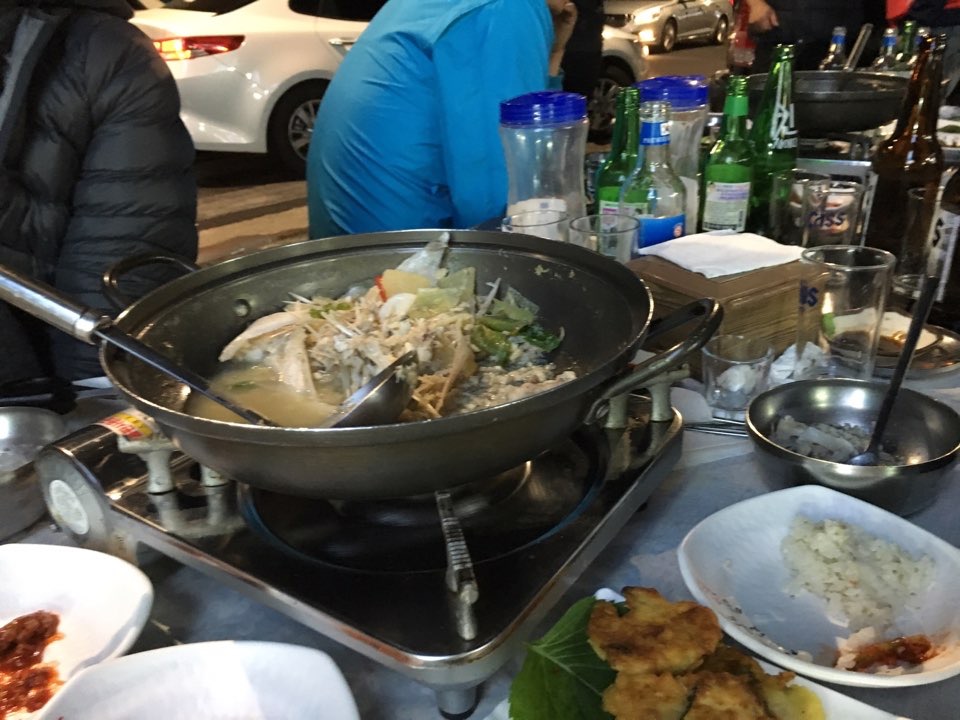
 Anyway, here is Day 2 of my sister’s visit to Jeju Island describing her visit to the best seafood restaurant in Jeju Island. Day 1 was Pork. Day 2 is Seafood! As you can imagine, Jeju island is famous for its fresh seafood.


 [caption id="attachment_7928" align="aligncenter" width="500"]
 [caption id="attachment_7943" align="aligncenter" width="500"]
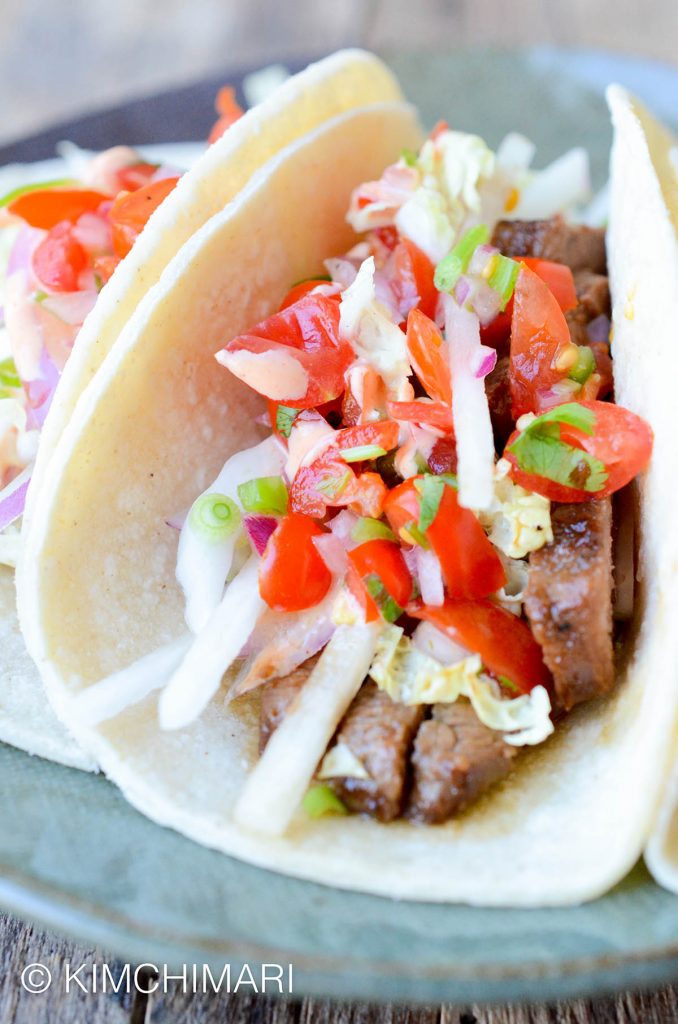
 [caption id="attachment_8477" align="aligncenter" width="1024"]
 [caption id="attachment_8651" align="aligncenter" width="1024"]
 [caption id="attachment_9148" align="aligncenter" width="736"]

 [caption id="attachment_9238" align="aligncenter" width="714"]
 [caption id="attachment_9270" align="aligncenter" width="1200"]

 [caption id="attachment_9330" align="aligncenter" width="678"]